Timeneye is a free online task time tracker where you can dedicate timers to your projects to better manage the time you invest on them. Using this, you can divide your work into incomplex tasks and time-track them. Timeneye timers will tell you which task is taking too long and which task is really short.
You can easily create a timer on the timetable layout of your dashboard with a couple of clicks. You don’t have to browse other tabs to create projects and clients. All can be done on the dashboard when you are registering a timer for a project with different phases. Once you have activated it, the timer will tick till you register it as an entry. You can also pause a timer if you happen to be working on something else.
You can easily add your team members too. Just enter their name, add them by email and you can assign them to a project that you’ve created. Reports about Users, Projects, Activity, Client, etc can be easily generated too by providing the specifics. You can also add Integrations like Basecamp and Google Calendar to track time of meetings and events. The limitation of the free version is that it is limited to only one user with unlimited projects and timers. You basically start with a free 15 dollar plan with 5 users for 15 days(you can extend it with one week by connecting Timeneye with your Twitter). After the 15 days, it is reduced to 1 user with unlimited features.
So lets take a better look at Timeneye. You can also try out Tmetric, which is another task tracking website.
How to add Task Timer to your Project on Timeneye
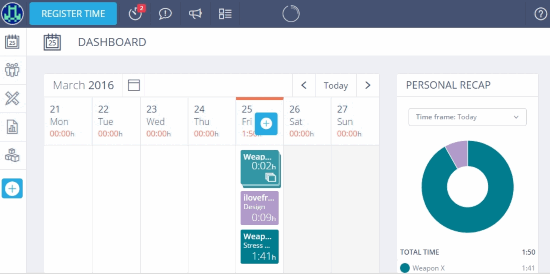
The dashboard of this task time tracker is mainly a calendar where you can add tasks with their timers. On the left there is a panel to manage other functions of Timeneye. The top ribbon gives you notifications, tracks active timers and tells you about entries log.
To add a timer, click on the ‘plus‘ button of the current day to add a task timer. It will ask you to select a Project. If you haven’t added a project, then click on create a new project from the drop down menu. When creating the project, you can also create Clients and the project Phases. The project can be tagged as billable with a rate per hour and a total time Budget.

The Time Worked field is for adding an offset to the timer in case you’ve already devoted some time to the task. When you’ve entered all the required fields, click Start Timer to roll the timer.
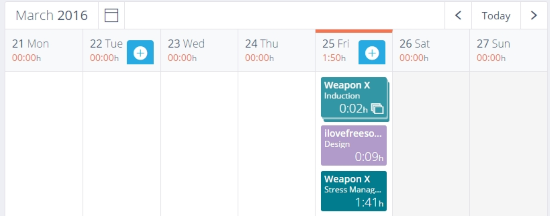
Timers of the same project and phase will group themselves with each other. When a timer has outlived its usefulness, you can save it as an entry to mark how much time you spent on a particular task. You can also add an entry manually if you’ve spent time on a task but haven’t timed it. This can be done by clicking Save as an Entry from a timer’s dropdown menu on the calendar or when you create a timer.
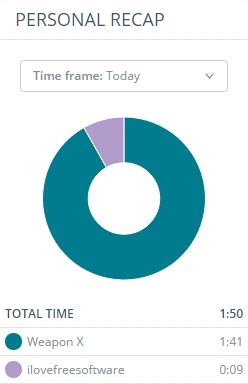
A Personal Recap will be given on the right side of the dashboard which will show you the total time spent on a task throughout the days. The pie chart will give a better idea on how you have managed your time with various projects/tasks.
How to Review your Team on Timeneye
Timeneye will also help you track your teammates on how much time they have spent on various tasks if you’re an administrator. Click on Team Status on the left panel. Further, select a team mate and you’ll be shown how much time he/she has devoted on a particular task of a project. You can also edit the timers for correction.
How To Manage Projects on Timeneye
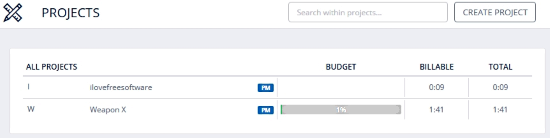
Click on Projects on the left panel to be shown all the projects you have added on Timeneye. Here, you can edit and review the projects. The projects will be listed with the total budget, the billable time and the total time elapsed (including the offset, if any).
Clicking on a project will give you a more open table of the total time spent based on the phases of the project and their billable time.
If you click Edit on a project then you can edit out the project details like the color of the project, name, client, hourly rate, etc. You can also manage and add new phases to it as well as manage users and integrations on the other tabs.
How to Generate a Report on Timeneye

Timeneye also lets you generate various reports. They are:
- Project Report: This will generate a report of a selected project with a specified timeframe to show you various aspects of a project. Some of them are: budget time, billable time, phases and team members working on it.
- User Report: It’ll show you the team members’ time invested in various projects on a selected time frame.
- Effort Report: The effort report will show you the effort applied by individuals in your team on their respective tasks as tracked by their respective timers.
- Activity Report: The activity report will generate a report based on the tracked tasks. It will mention the user who took part in a task/project and the client related to it.
- Client Report: The client report is just like the User Report but focuses on the time spent on a client by working on their project.
You can export each report in PDF and CSV formats from the top left on every report page.
How to Add Integration on Timeneye
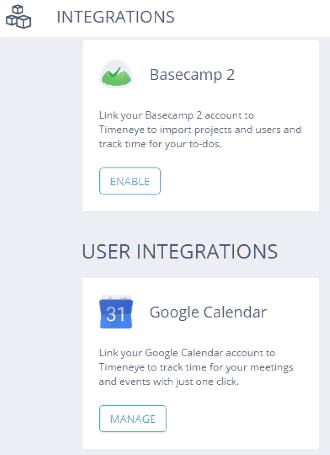
Adding integrations on this online task time tracker is easy. Click on Integrations on the left panel. You will see that you can add integrations such as Basecamp, Google Calendar, Asana Breeze, Podio, etc. To add an integration, click on Enable or Add Chrome Widget button of an integration. You’ll be prompted to authorize Timeneye from that particular integration’s page and you’re done.
Final Verdict
Timenye is easy to use and provides you the ability to generate reports. It has focused on time tracking keeping office projects in mind. However, I feel it lacks a USP feature that can shadow it from the image of a generic task time tracker. Therefore, I award it 4 stars.
Try Timeneye here.
Know a better alternative to Timeneye? Do share it in the comments!