This tutorial explains how to enable floating Search box of Cortana in Windows 10. That means you will be able to use the native Search box of Windows 10 as floating pop-up on your desktop screen. After that, you can search your desktop, apps, files, and other things, just like the regular search. Everything will be the same, except the fact that you don’t have to click on Cortana icon or Search box in Windows 10 taskbar to search for a particular thing.
To enable floating Search box in your Windows 10 PC, you need to do some simple tweaks in the Registry Editor. This tutorial will help you do that with ease. Do note this floating Search box feature of Cortana has come with the preview build 17040 of Windows 10. That means, this feature is not available in Windows 10 Fall Creators Update but it will come in the next stable update. In the screenshot below, you can see Cortana’s floating Search box. As you can see, everything is same. You can use Microphone to ask Cortana or type your query to get the results.
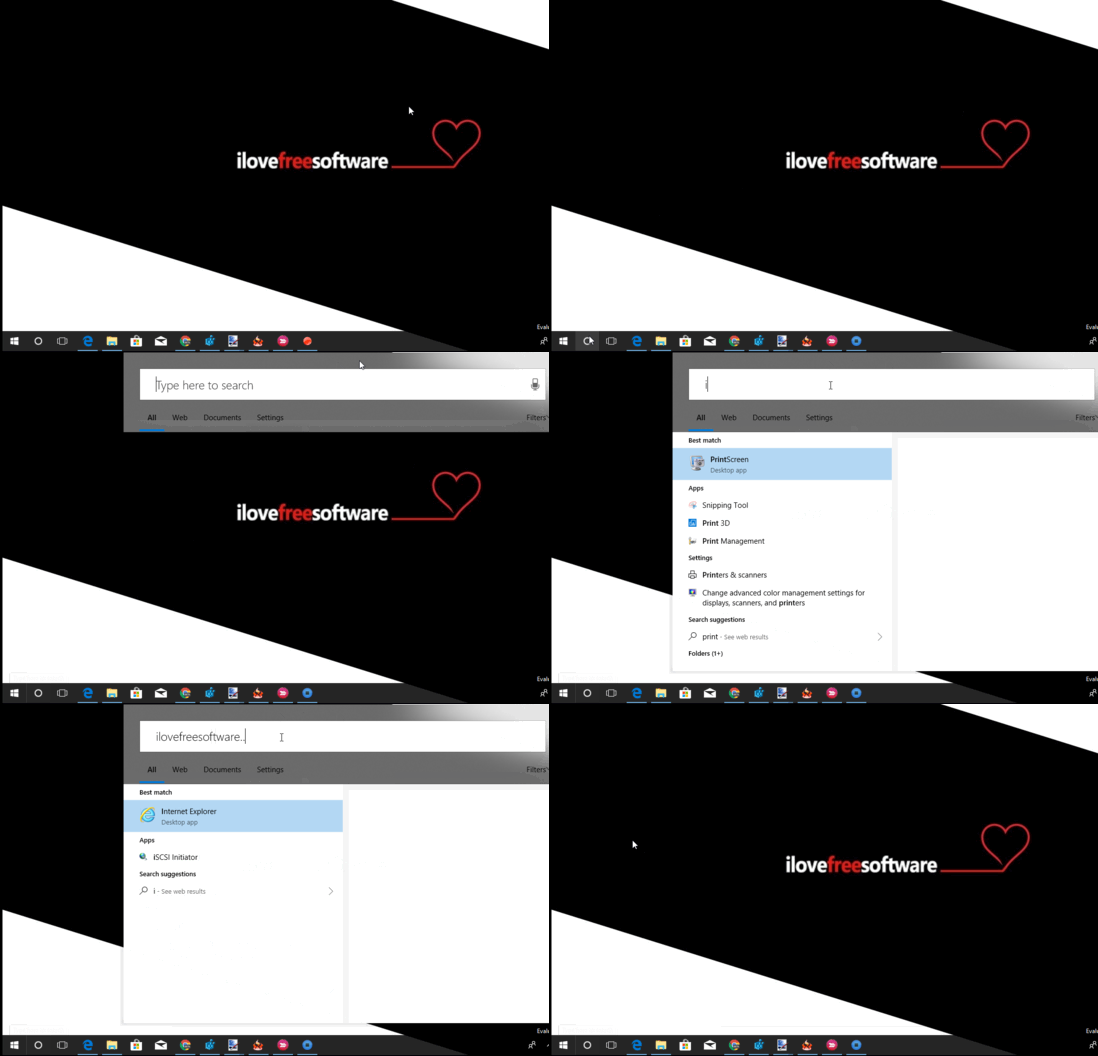
This floating Search box feature of Windows 10 is similar to the Spotlight feature of MacOS. Also, there are many third-party application launchers also available that come with floating Search box to find files and folders, applications, etc. So, if you were waiting to have this floating Search box as a built-in feature in Windows 10, then your wait is over.
How To Enable Floating Search Box of Cortana In Windows 10?
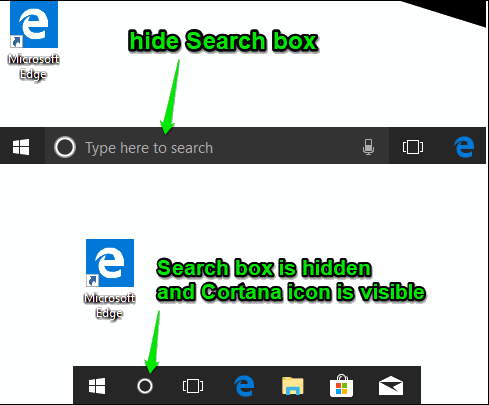
Step 1: The first step is to hide Search box in your Windows 10 PC. It is so because floating Search box works only when Cortana icon is visible on Taskbar or you have set Search box as hidden. If the Search box is already visible, then you first need to hide Search box to make this feature work.
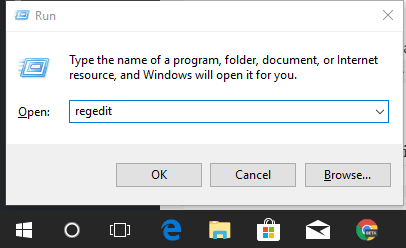
Step 2: This is a very simple step, you need to open Registry Editor. Press “Windows logo key + R” hotkey to open Run Command, write “regedit“, and press Enter key.
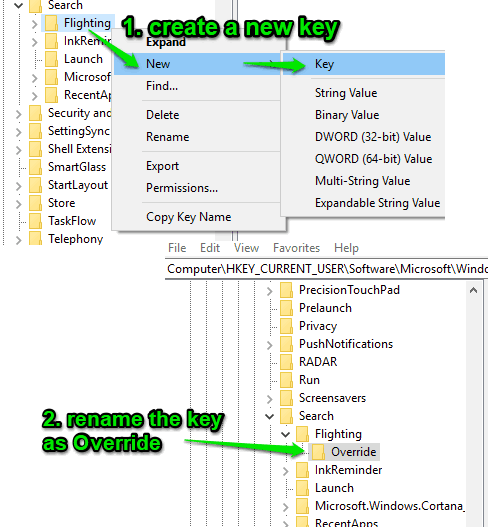
Step 3: In Registry Editor, search for the “Flighting” key. This path will help you find that key: HKEY_CURRENT_USER → Software → Microsoft → Windows → CurrentVersion → Search → Flighting.
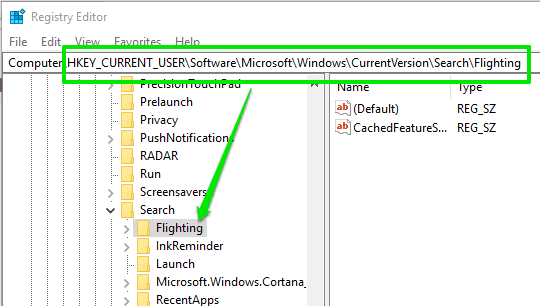
Step 4: Right-click on that Flighting key, then go to “New” context menu and select “Key” option. It will create a new Registry key under Flighting key. Rename the new key with “Override” name.
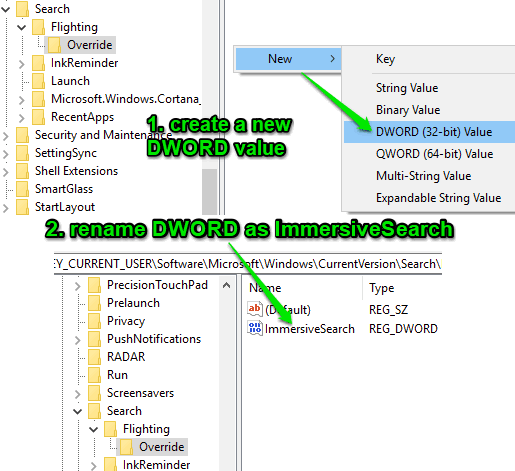
Step 5: Select Override Registry key that you just created. After that, right-click on the empty area on the right side, use “New” context menu and click on DWORD option. See the screenshot below. This will add a new DWORD value on the right-side. Rename that value with “ImmersiveSearch” name.
Step 6: This is the second last step. All you have to do is double-click the ImmersiveSearch DWORD and DWORD value editor box will open. In that box, you will see that Value data is set to ‘0’. You need to change this data to ‘1‘.
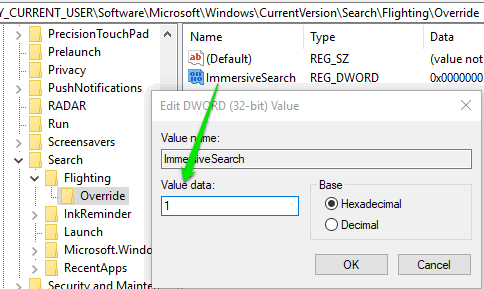
Press the OK button and it will save the changes.
Step 7: Now all you have to do is open the Search box of Windows 10 as floating pop-up. To open floating Search box, you can either press “Win+S” hotkey or click on the Cortana icon in Taskbar (if visible).

That’s it! Now floating Search box is visible, search for any application installed on your PC, file, folder, etc.
The Conclusion:
This is definitely a very helpful and interesting feature. You don’t have to use the taskbar, again and again, to search for some file while working on other application in your Windows 10 PC. Just a hotkey and floating Search box of Windows 10 will be there to begin the Search. I am quite happy to use this feature. You may also try it.