This tutorial is about how to auto sync songs you download to iTunes.
Since the beginning, one of the major drawbacks of iTunes was the lack of ability to auto sync music files to your iTunes library. But with the release of the iTunes 9.0, this major problem was solved. The solution was any music file that lands on the folder “Automatically Add to iTunes” gets automatically synced with your iTunes library.
In this tutorial, I am going to show you how to automatically sync all your music files that you download directly to iTunes. I have used a free tool for Windows named, “Belvedere” to auto sync songs. Using this tool, you can create rules by assigning a trigger associated with any particular action. So, I am going explain how to create a rule for syncing songs you download to iTunes automatically.
You may also check out How to Sync iTunes Playlist to Blackberry, Android, Windows Phone.
How to Auto Sync Songs You Download Directly to iTunes:
Step 1: The first thing you need to do is install and open “Belvedere”. Then go to the system tray, right click on the Belvedere icon and select “Manage”. A window popup will appear with 3 different tabs named, Folders, Recycle Bin, and Preferences.
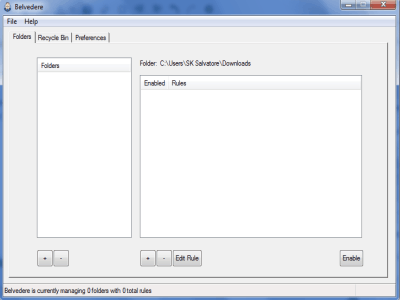
Step 2: Go to the “Folders” tab to start creating new rules. The tab is divided into two sections, one is the folders section and the other one is the rules section, as shown in the above image. Now, let me explain how to create a rule for automatically syncing music files to iTunes.
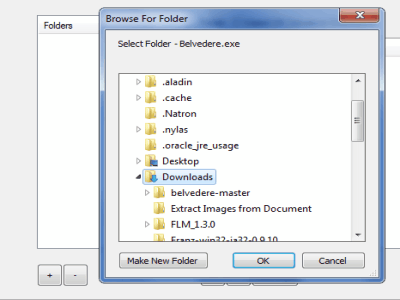
Step 3: Click the “+” button at the bottom of the folders section to select the source folder. The source folder is basically the one where all your music files are downloaded. If you download music to multiple folders, then you can create separate rules for each.
Step 4: After that, click the “+” button at the bottom of the rules section to create a new rule. You will be able to enter a description, choose rule options, choose any action, and set a trigger for that action. At the top of the window, simply type a description for the rule and tick the “Enabled” and “Recursive” rule options.
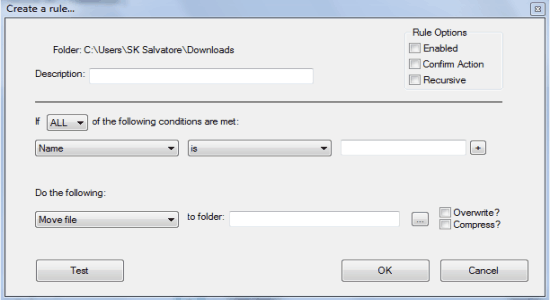
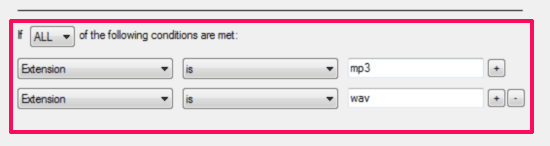
Step 5: After that, you have to create an action and set a trigger according to that action. To create the action, simply follow the conditions mentioned in the highlighted part of the screenshot.
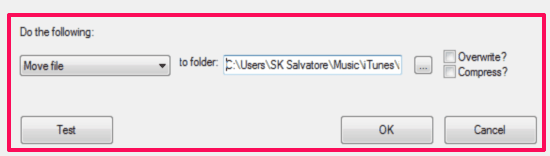
Step 6: When you’re done with creating an action, proceed to the “Do the Following” section at the bottom of the screen. It has a direct option “Add to iTunes” in the drop down menu, but I couldn’t make it work for syncing music files automatically. So, I am going to use an alternative option to do the same.
Step 7: In the drop down menu, select “Move File” instead of “Add to iTunes” and then click the “Browse Folder” button on the right.
Step 8: After that, find and select the destination folder “C:\Users\”Your Username”\Music\iTunes\iTunes Media\Automatically Add to iTunes” and hit “OK”. That’s all, the new rule will be created instantly.
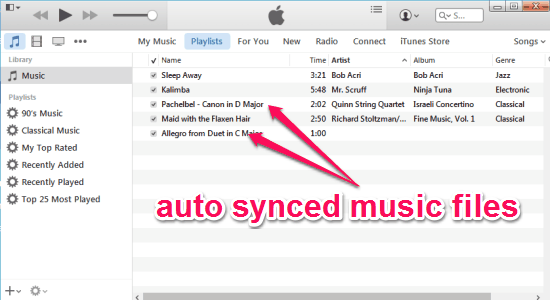
Step 9: As we have added two extensions i.e; MP3 and WAV while creating the action, each time you download songs with these extensions will automatically land on the folder “Automatically Add to iTunes”. All the music files that land on this folder also gets automatically synced to iTunes library.
My Final Verdict:
If you’re looking for a way to auto sync songs that you download directly to iTunes, then my friend this tutorial is definitely for you. In this tutorial, I have explained a simple way to automatically sync music files by creating a rule using Belvedere. I hope you like this tutorial.