Here is a free software to exclude files and folders from being scanned by Windows Defender Antivirus in Windows 10. It is named “Defender Injector“. This will be helpful to protect some important files, which Windows Defender Antivirus might consider as threats and remove them while scanning. Using this software is also pretty simple. There will be a basic interface to add folders and/or files to the whitelist. Such files and folders won’t be scanned for viruses.
Windows Defender Antivirus already provides the option to add files and folders to the exclusion list. But, the manual process is lengthy and you can add one file or folder at a time. You need to open Settings, access Updates menu, Windows Security, Virus & threat protection, then exclusion section, and finally, you’re able to add a file/folder to that list. This software, on the other hand, it easier to use and you can add files and folders in bulk.

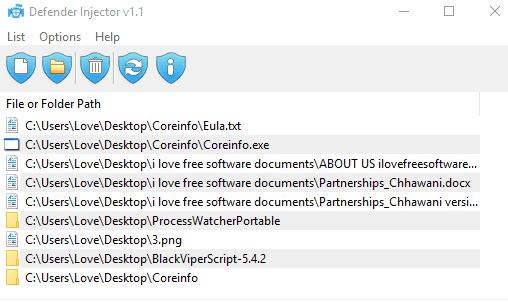
In the screenshot above, you can see its interface where files and folders are added. Such files and folders are also visible in the exclusion list under Windows Security of Windows Defender Antivirus.
How To Add Files and Folders to Whitelist to Protect Them from Being Scanned by Windows Defender Antivirus?
Step 1: Download the zip file of this software. You can find its download link at the end.
Step 2: Open the software interface and you will see options to add a file and folder to the exclusion list. Such options can add only one file or folder at a time. To bulk add files and folders to whitelist, select them and drag n drop them on its interface. See the first screenshot.
The changes are added automatically. That’s it! You can add more files and folders to the list. You can also remove the excluded files and folders anytime you want.
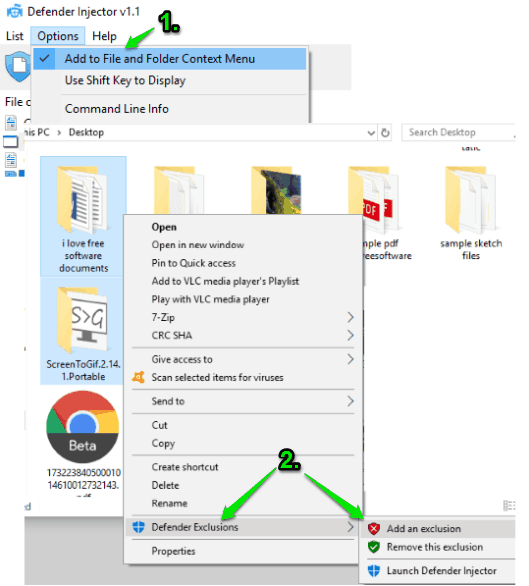
Step 3: This step is optional but handy. You can add this software to the right-click context menu. This can be done using Options and selecting “Add to File and Folder Context Menu” option available on its interface. After that, whenever you will select files and folders and right-click on those items, you will see “Defender Exclusions” option. See the screenshot added below.

Under that option, you will see Add an exclusion and Remove this exclusion options. Use these options as per the requirements.
You may also check this article to enable/disable Windows Defender Antivirus in a single click.
The Conclusion:
Those who use Windows Defender Antivirus as their primary antivirus and looking for some easier option to add files and folders in bulk to the exclusion list, this software is helpful. Just a few basic steps and you can exclude files and folders from being scanned by Windows Defender Antivirus.