This tutorial details how to enable SmartScreen filter in Windows 10. Being the newest addition to Microsoft’s family of Operating Systems, Windows 10 includes a truckload of features, in all shapes and sizes. These include cover everything from visual enhancements to security improvements. As far as the security features are concerned, they deserve a special emphasis, as Windows 10 has a lot of security enhancements that ensure an overall trouble-free user experience.
One such incredibly useful feature is the Windows SmartScreen filter. Introduced with Windows 8, SmartScreen filter protects your computer (and the data stored on it) from malware and phishing attacks. Windows SmartScreen filter essentially checks (or screens, hence the name) the URLs and programs that you access against a blacklist of harmful websites and applications. If the program/URL is found to be a suspicious one, Windows SmartScreen filter immediately blocks access to it (Although you can manually bypass it if you want). Quite interesting, right?
Sure as hell it is, and that’s why it makes all the sense to enable it. Let’s jump over to the other side of the break and find out how you can enable SmartScreen filter in Windows 10.

How To Enable SmartScreen Filter In Windows 10?
Turning on SmartScreen filter in Windows 10 is a fairly simple and straightforward affair. Read on the following illustrative walkthrough to see how to get it done:
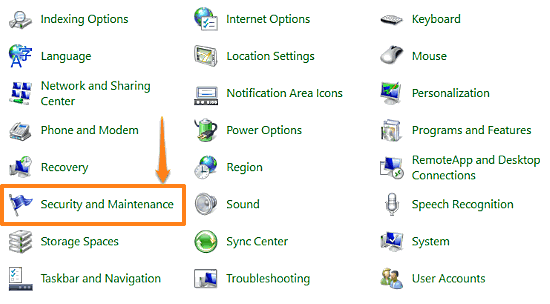
Step 1: Go to Windows Control Panel and click on the Security and Maintenance option.

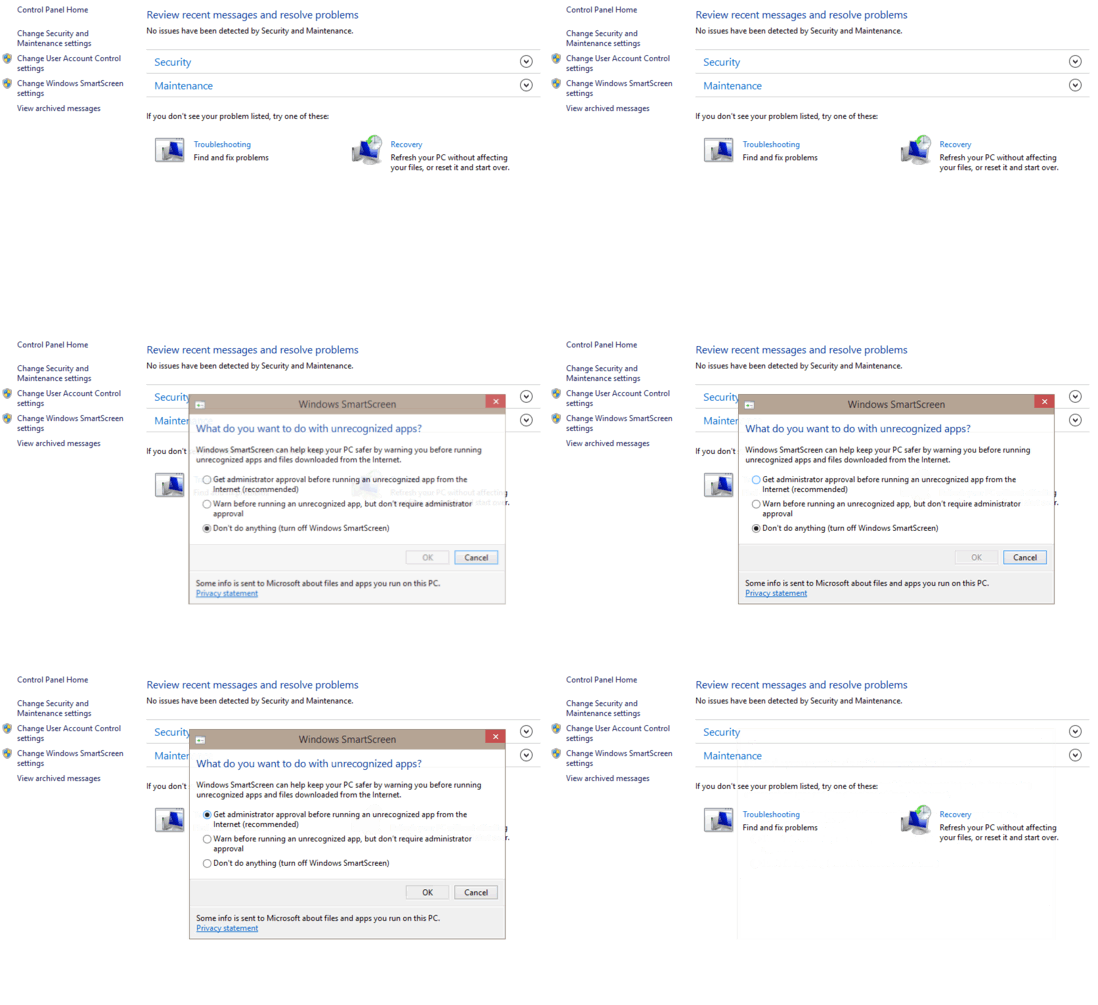
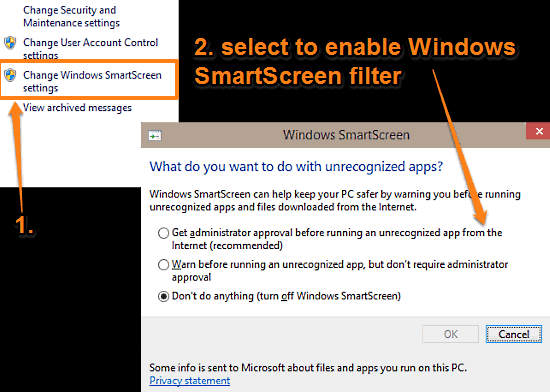
Step 2: You should be now on the Security and Maintenance configuration page. Click on the Change Windows SmartScreen settings option on the left (requires administrator privileges). Once you do that, a small window will pop up. Here, select the system recommended “Get administrator approval before running an unrecognized app from the Internet” setting, and click OK. Check out the screenshot below:

And we’re done. Going forward, whenever you access a URL or try to run an application, Windows SmartScreen filter will check it against the blacklisted websites and applications, and take action as necessary. Now that, is awesome.
Do Check Out: Enable Or Disable Windows Firewall Rules In Windows 10
Closing Thoughts
Windows SmartScreen filter is a hugely useful built-in security feature of Windows. Simple and easy to use, it ensures that the programs and URLs you access, are indeed what they claim to be, thus contributing towards a safer and better user experience. Give it a shot, and let me know what you think in the comments section.