Here is a simple tutorial that explains how to prevent disabling Internet Explorer extensions.
Internet Explorer is one of the most commonly used web browsers. It is developed by Microsoft and comes free with all Windows installations. Apart from providing usual browsing facility, Internet Explorer provides some extensions; which you can add separately to Internet Explorer, to add extra functionality to the browser. You can add these extensions to your IE browser, use them till you want to, and then easily disable them through the Add-On Manager. However, there are certain cases when you don’t want the Add-on to be disabled. In that case, you need a solution to prevent disabling these Add-ons from your IE browser.
So here we are, with a brief tutorial to explain how you can prevent your IE extensions from being disabled through the Add-on manager. If you are using Google Chrome, you may read our other post on how to prevent uninstalling Google Chrome extensions. This may be helpful in case you want to prevent your kids from removing parental control plugins from your Chrome browser.
For now, lets see what all you have to do in order to prevent anyone from disabling your Internet Explorer extensions.
- First of all, open Registry Editor. If you don’t know where to locate your Registry Editor, just open the Command Prompt, type “regedit”, and press Enter.
Note: You can open Registry Editor only if you have administrator rights.
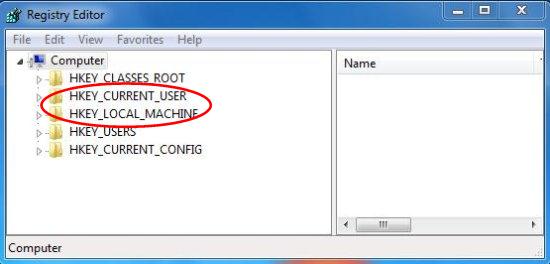
- In the Registry Editor window, you can see different registry folders on the left panel. Here you have to create two new registry entries in following folders: HKEY_CURRENT_USER and HKEY_LOCAL_MACHINE. We will see how to this, one by one.
- Navigate to HKEY_CURRENT_USER > Software > Policies > Microsoft.
- Now make a new folder with the name “Internet Explorer” under Microsoft. To do this, just make a right click on Microsoft folder and select “New > Key” option from the context menu. Rename it as Internet Explorer.

- Repeat step 4 to create another folder naming “Restrictions” under “Internet Explorer”.
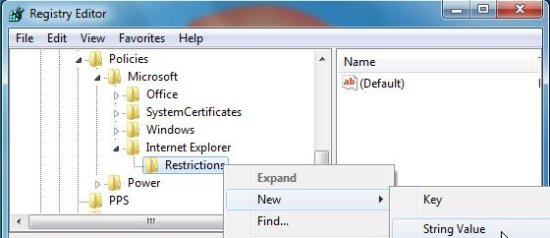
- Now you have moved to the desired path: HKEY_CURRENT_USER > Software > Policies > Microsoft > Internet Explorer > Restrictions. Here you have to create a registry entry. Right click on “Restrictions” folder and select “New > String Value”.
- This will create a new registry entry, which will appear on the right panel. Now Rename it as “NoExtensionManagement” and Modify its value to “1”. Both these options are available in the context menu of the registry entry.

- Repeat steps 3. to 7 for HKEY_LOCAL_MACHINE. This will create a new registry entry inside HKEY_LOCAL_MACHINE > Software > Policies > Microsoft > Internet Explorer > Restrictions, with name “NoExtensionManagement” and value “1”. Now you are all done.
- Close the Registry Editor and Restart Internet Explorer.
- Now if you open the Add-on manager, you will notice that the “Disable” button has been deactivated for all the extensions, preventing them from being disabled in Internet Explorer.

This was a simple tutorial explaining how you can prevent others from disabling your Internet Explorer extensions. Hope this will help you.
To reactivate the “Disable” button in Add-on manager, simply delete the two registry entries from Registry Editor.
Note: You are strictly advised not to mess with other registry entries in your Registry Editor; Otherwise your system may run into problems.