AndreaMosaic is a free photo mosaic maker software. There are multiple interesting features that you won’t find with many similar software. It lets you set mosaic resolution (300 DPI, 1200 DPI, 200 PPI, etc.), mosaic size, number of tiles, and number of times a tile should be used for generating your mosaic.
Apart from this, it also helps to set percentage of color change for creating the mosaic, set high quality processing, and choose image format for saving the image.
Hundreds of tile images can be used by you to generate mosaic of your main image. Before generating the final mosaic, you will be able to set output format, and destination location for storing the mosaic.
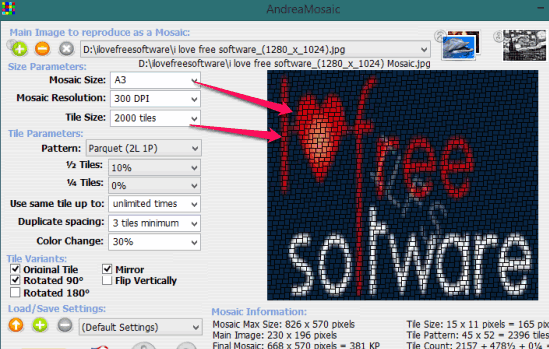
In above screenshot, you can see interface of this software where tiles size, mosaic size, and resolution can be set by you for main image.
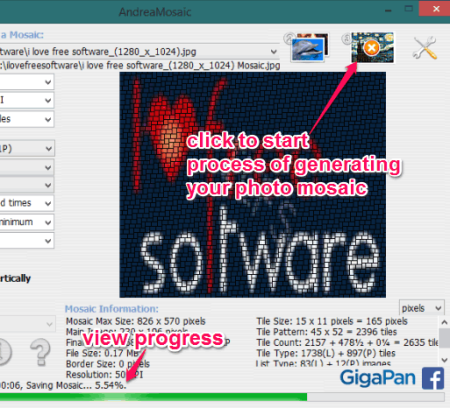
Screenshot below shows a sample photo mosaic created by me with the help of this freeware.
Note: It also comes with a special feature to extract tile images from a video file, but it didn’t work me. However, you can give a try to this option while adding tile images for your mosaic.
How To Use This Free Photo Mosaic Maker?
Download its portable or installer version using the link given at the end of this review. Install this software and open its interface. After this, use these steps to generate your own photo mosaic:
Step 1: Use ‘+’ button to insert the main image for which your mosaic will be generated. It supports jpg and png image.
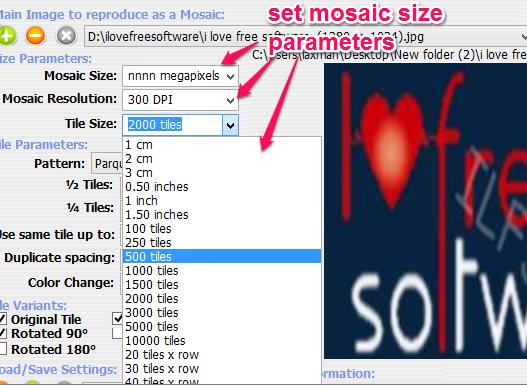
Step 2: This is one of the crucial steps in which you have to set size for your mosaic, number of tiles to create mosaic, and resolution for your mosaic. You can set preferences using drop down menu associated with each option. For example, you can set A4 size, 200megapixels, 500megapixels, 30 tiles, 50 tiles size for your mosaic.
Apart from this, you can also set how many times a duplicate tile image (if any) should be added to your mosaic. Spacing for duplicate images can also be selected by you using presets. Based on your preferences, you will be able to see the changes in main image at right part of its interface.
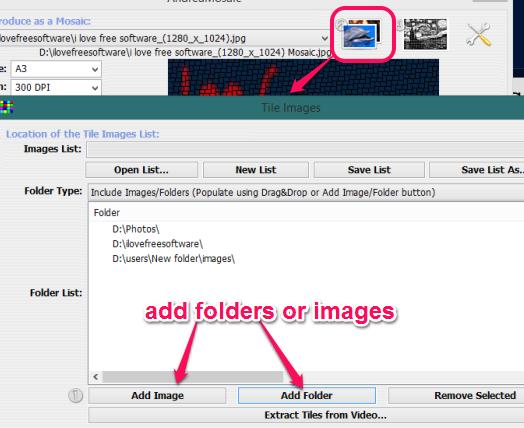
Step 3: This step is used to add tile images for your mosaic. Use available image icon to open Tile Images window, After this, you can select multiple images from PC or can add a whole folder that contains images.
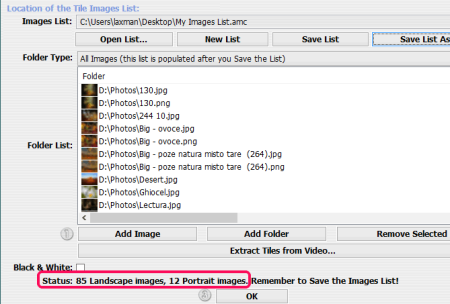
After inserting the images, you can Save Images list for later use. Now simply tap on OK button and it will prepare all those tile images for processing.
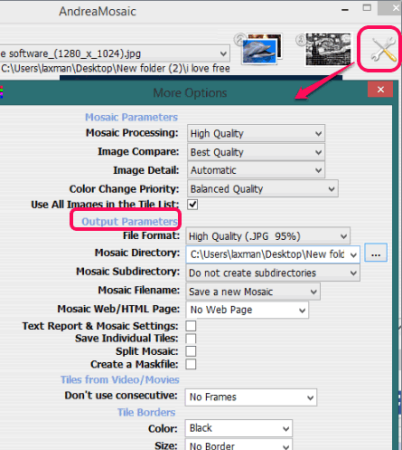
Step 4: Come to the main interface and click on Settings button. This will help you to set mosaic processing quality, set tile border color, and output format. Mosaic can be saved as jpg, tiff, psd, raw, bmp, or any other supported format.
Step 5: This is the final step to generate your mosaic, click on available image option to start generating mosaic. Once the mosaic is created, it will prompt you to open mosaic from destination location.
Conclusion:
No doubt that AndreaMosaic is an advanced photo mosaic maker software. There are multiple valuable features that can be used for generating a beautiful photo mosaic.
