Here is a tutorial that explains how to create a virtual drive in Windows 8. Windows 8 has complete support for creating virtual hard drives, right from out-of-the-box state. Creating and managing virtual drives has been made extremely simple with the Windows 8 Operating System, as the Windows 8 OS has a native support for them.
A virtual hard drive is a disk which can be used as a normal hard drive, and it can contain files, music etc. A virtual hard drive saves users the trouble of installing a new hard drive, or creating a partition in their existing hard drive. Creating partitions/ installing a new hard disk can be cumbersome, and this problem can be worked around by using the simple process of virtual hard disk creation. A virtual hard disk is so useful, that you can also use it for installing a secondary operating system on your device. All of this can be achieved by creating partitions as well, but hey! creating a virtual drive is a lot easier, and if you wish to delete a virtual hard drive, you have to simply delete the .vhd file that you have created on your main hard drive, which is much easier than removing partitions, and then having to reallocate the deleted space back to your main hard drive, and then having to merge the free space.
Anyways, let’s cut the long talk short, and see how exactly a virtual hard dive is created. This tutorial explains how to create virtual drive in Windows 8.
How to Create Virtual Drive in Windows 8:
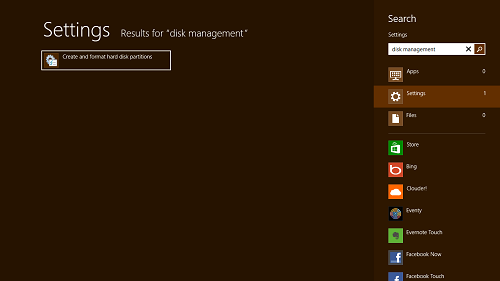
Step 1: In the Windows 8 Start Screen, enter the keywords “Disk Management”. Select Settings from the pane at the left, and once you have done so, click on Create and format hard disk partitions in the pane at the right.
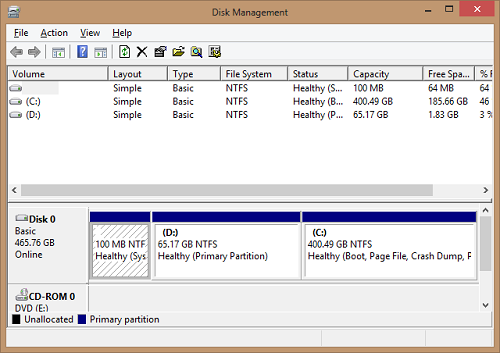
Once you click on the aforementioned option, you will be presented with a window that looks like the following screenshot.
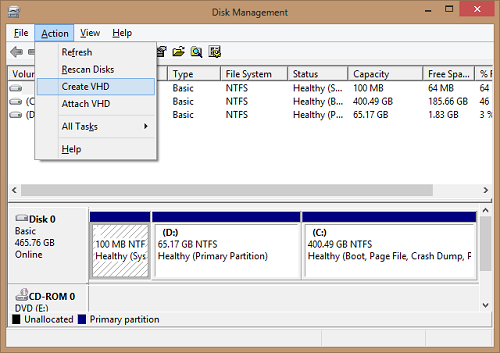
Step 2: In the above window, click on Action Menu button at the top. Once you see the list of options that appear, click on the Create VHD option.
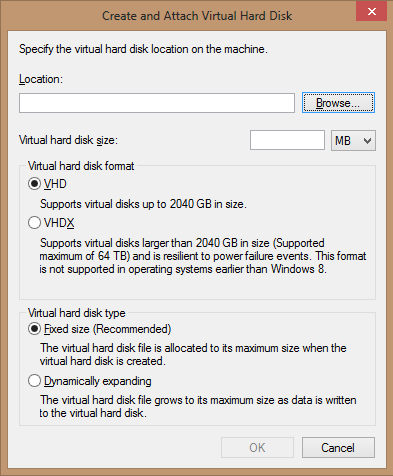
Step 3: Upon clicking on Create VHD option, you will be presented with a window that looks like the following screenshot, and here you can see the various options to configure the VHD.
In the above screen, specify the location where you want to save the .vhd file by clicking on the Browse button. Select the VHD option in the Virtual hard disk format options, and select the Fixed size option in the Virtual hard disk type options. Specify the space in MB that you want to allocate to the Virtual Hard drive in the Virtual hard disk size box.
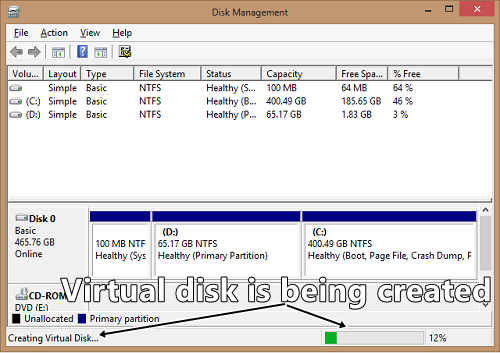
Step 4: Once you are done with setting up all these options, you will be brought back to the main window of Disk Management screen. Here, if you will look carefully at the bottom, you will be able to see that your Virtual Disk is being set up. This disk can then be mounted as your hard drive. The process of creation of your Virtual Hard drive can take up to 30 minutes, depending on the size that you have specified for the Virtual Hard Disk, and this might just be the best time for you to catch your breath, relax and grab a quick cup of coffee!
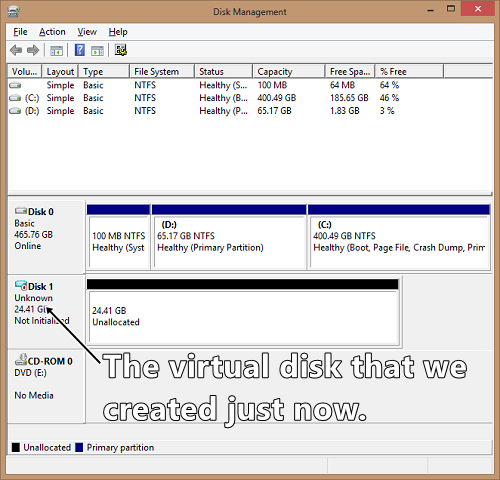
Step 5: Once the Virtual Disk has been created, it will show up on the main screen of Disk Management screen (see below screenshot):
In the above window, you will see the drive as Unknown. This drive has not yet been listed in our computer as a new drive. To get the drive listed on our machine, let us proceed to the next step.
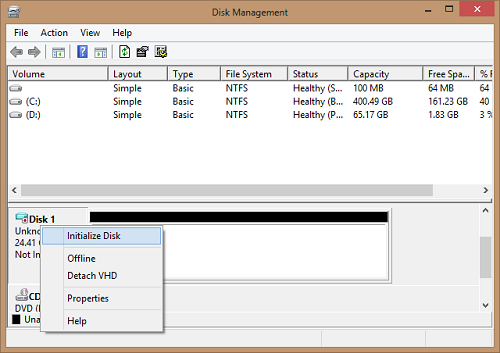
Step 6: Right click the Disk listed as Unknown (Disk 1 in my case) and select the Initialize option. This option is displayed in the below screenshot.
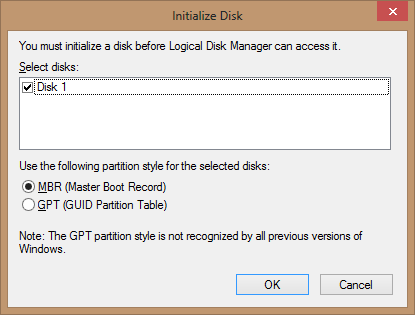
Step 7: Once you click the Initialize option, you will be shown a pop-up window, where you have to choose between MBR and GPT partition style for your new hard drive. If you prefer speed, choose the GPT option. However, if you want your virtual hard drive to be compatible with all the previous Windows versions, choose the MBR option. Ultimately it’s your choice, but I personally prefer compatibility and stability over speed, and so, I preferred to go forth with the MBR option.
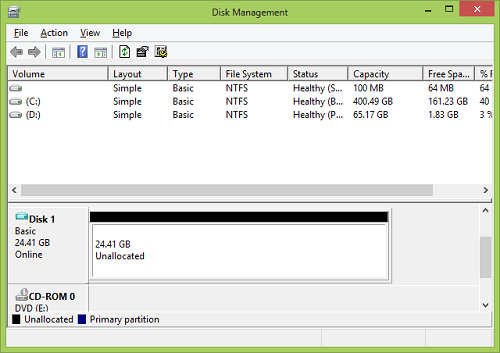
Once you are done choosing your partition style, click OK. Now, you will be taken back to the main screen of Disk Management. If you will look closely, you will now see that our Virtual Drive is listed as Basic now, instead of Unknown, which it was listed previously.
Now, let’s move on to the final step of assigning a Drive letter to this disk.
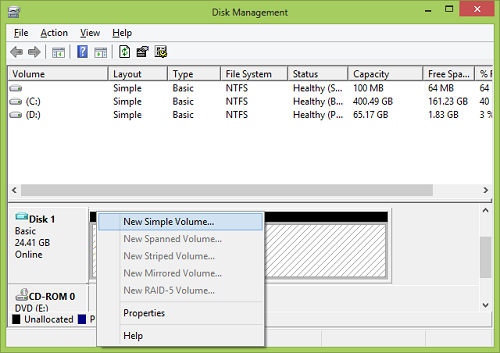
Step 8: Right click and select New simple volume. (see below screenshot)
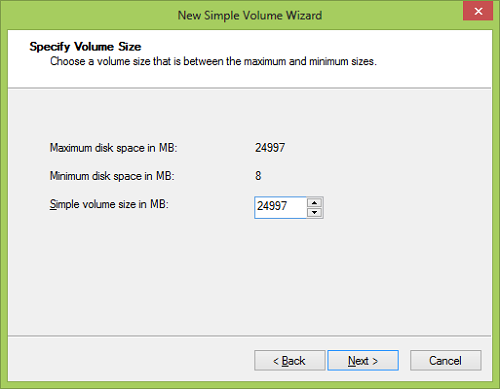
Once you click on New simple volume, you will be taken to a window wherein you have to specify the size of your new drive etc. Once you have done so, click Next.
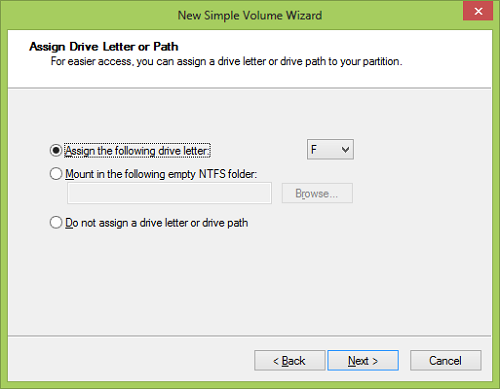
On clicking Next, you will be presented with the following screen, where you can choose the drive letter of your choice from the drop-down menu. There is no need to mess around with any other option in this screen.
Once you have selected the drive letter of your choice, click the Next button. Upon clicking the Next button, you have to choose the file system of the new drive, and here, you can assign a drive label to your drive.
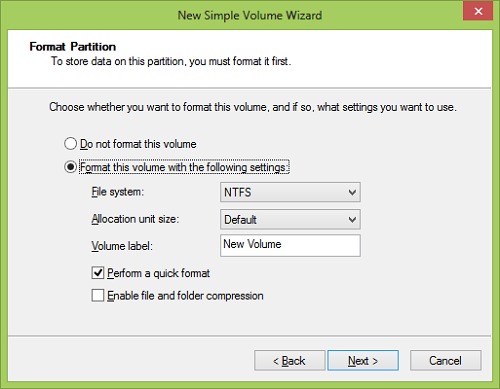 It’s the best to let the file system stay as NTFS, although, you can also choose FAT32. Both are pretty stable. Specify a drive label, and don’t mess with the other settings. Click on the Next button.
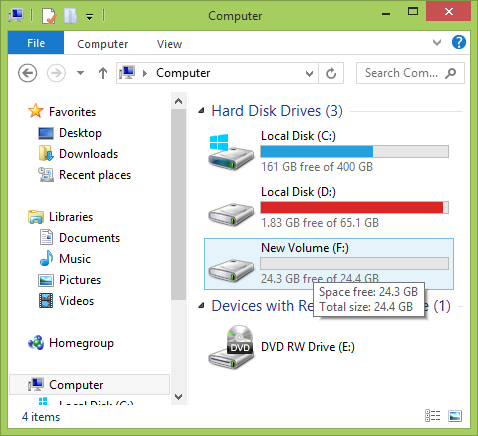
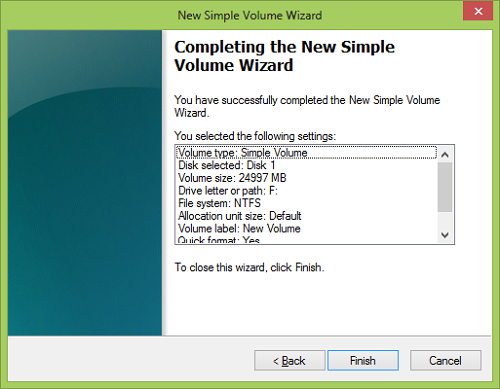 In the above window, click the Finish button. A quick format will be performed, and then, the drive will be visible in your File Explorer. (see below screenshot)
You can see above that my virtual hard drive has successfully been set up. That’s it. This is all you need to know to get started with creating virtual drives on your Windows 8 machines!
Difficulty Rating?
The above tutorial is not meant for novices/ new users. It is recommended that you have sufficient computing skills and knowledge before you attempt the above tutorial.
This tutorial is classified as MODERATELY DIFFICULT.
