This post talks about how to use Windows 10 Movie Moments app. After going through this post, you’ll be able to easily use the Windows 10 Movie Moments app for editing and creating some stunning video clips.
Movie Moments is a free video editing app for Windows 10 which lets you easily edit your videos to make them look awesome by turning them into short 60 seconds moment clips. You can either capture a new video or import your existing videos for editing. Actually, the main purpose of this app is to trim the videos to chop any memorable moment (60 seconds) from a long video and share it with others.
Apart from that, you can also make it more interesting by adding text captions and changing the style of the text. Another useful feature of this app is that it offers some predefined music with different moods which you can add to your moments (60 seconds video clips). If you don’t find your favorite music, then do not worry as it also has the option to add your own music from PC. Unlike other complex video editors, Movie Moments app comes with a few tools and it doesn’t require you to be an expert in video editing for using it.
How to Use Windows 10 Movie Moments App:
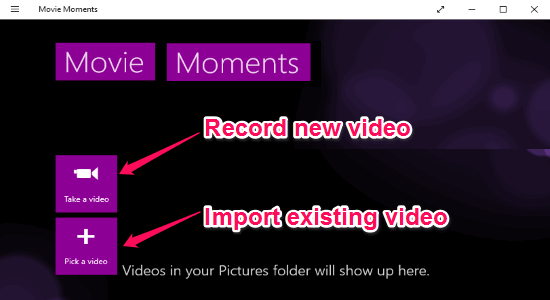
Step 1: First, install the Movie Moments app on your Windows 10 PC and then launch it to get started. On the main screen, you’ll see two different options named, “Take a Video” and “Pick a Video” using which you can either record a new video or import existing videos from your PC.
Step 2: After capturing or importing a video, the video editor will open up with all the tools like trimmer, text caption inserter, etc. At the bottom of the editor, you’ll see two small circles named, Start Point and End Point which you can drag to chop or trim your favorite part of the video. The chopped part is called “Moment” as per the app. Remember, the maximum length of any moment is limited to 60 seconds.
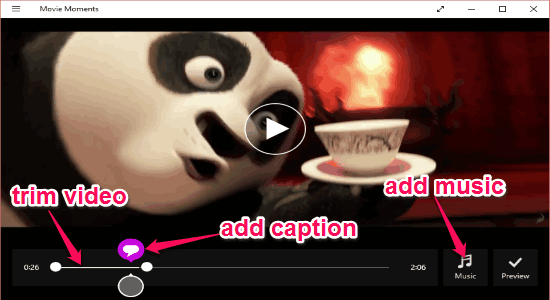
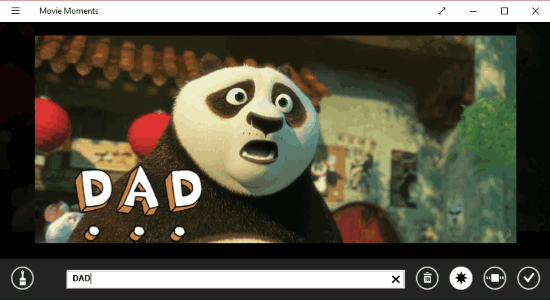
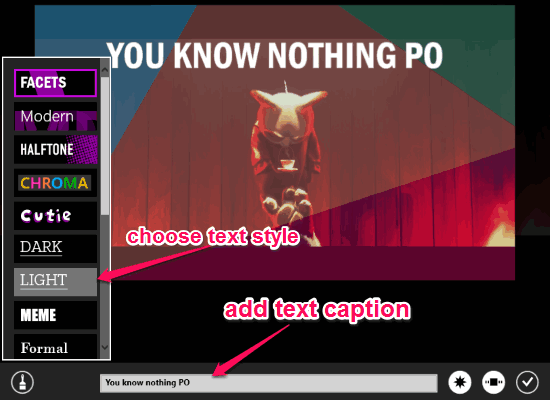
Step 3: When you’re done trimming the video, simply click on the caption bubble between the Start and End points, as shown in the above image. As soon as you that, the text inserter window will appear where you can type anything you want in the input field to add a caption to the moment. After adding a text caption, you can change the style of the text by clicking the “Brush” icon at the bottom left corner of the editor. Currently, it offers 16 different text styles which you can use for your videos. There you’ll also see two different icons on the bottom right which can be used to emphasize the text and freeze the caption on the video.
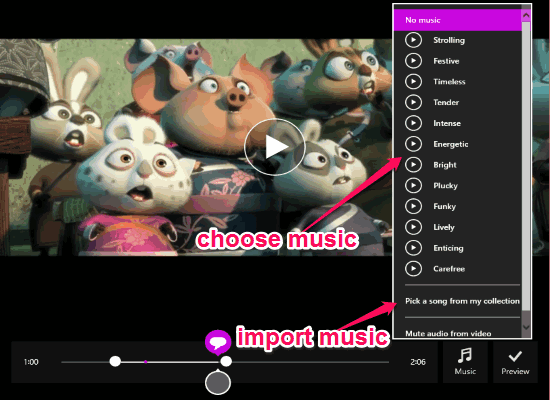
Step 4: Once you add a text caption,, click the “Tick” button to proceed. Now, you can click on the “Music” option on the editor to either add a predefined music or add your own from PC. This app offers a predefined music pack with 13 musical tones which you can download for free and apply to your moments.
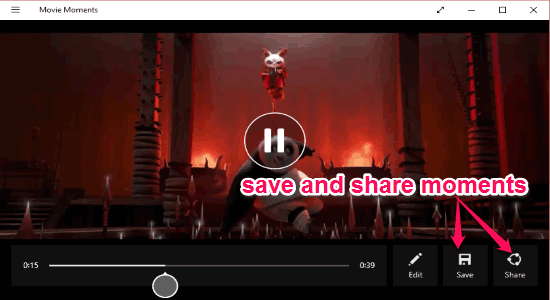
Step 5: After everything is set, simply press the “Preview” button at the bottom and it will start processing your video to make changes applied by you. Then you can preview the resulting moment, save the moment as an MP4 file, or share it directly with other via email and other social networks.
My Final Verdict:
Movie Moments is pretty simple and interesting app for all the Windows 10 users out there who wants to simply trim any specific moment from a long video and share it with others. Apart from this, it can also help you make the video clip more impressive by adding text captions and music. The user interface is intuitive and you can use it to create some stunning video moments without any hassle.