BiteSlide is a free online slidebook creator and publisher. Slidebook is something similar to a presentation, only it is online. This presentation can be shared with other people on the Internet.
Primary function of BiteSlide is to help teachers who are interested in conducting online courses to present the content of their classes to students, with the help of presentations. 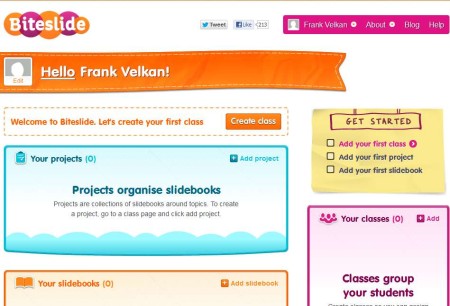
Control panel of this free online slidebook creator can be seen on the image above. To reach this point you need to register on the website. Three steps are needed in order for you to setup everything and get up and running, they are presented in the yellow square on the right. First you need to create a class, then project and lastly you need to create the actual slidebook, or presentation, they are both very similar concepts.
Key features of BiteSlide are:
- Free and simple to use interface: with lots of options to tweak
- Create 1 project with up to 15 students for free: upgrade for more
- Slidebook styles: collage, portfolio, album, scrapbook, moodboard
- Upload your own images or use content from Google and/or YouTube
- Add text, backgrounds, unlimited number of slides and so on
- Share the slidebook with students, give download links
With the development of Internet, education is starting to change more and more. More schools are offering additional assignment over the Internet. If you are a teacher who’s trying to embrace the development of technology and engage your users more, here’s a few pointers on how you can do that with BiteSlide.
Similar services: Drawium, Label 59.
How to create slidebooks and interactive presentations online with BitSlide
After registration, click on the Create Class button. This will initiate the three step setup process where you’ll be able to create the class, project that you’ll be working on and the actual slidebook, like we already mentioned. In the second step, when you’ve created the class, you’ll be offered with a registration code that you can give to your students so that they can register to your class. 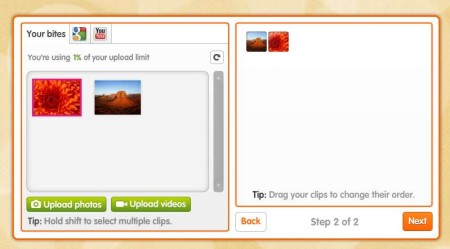 With the slidebook created, you can now start adding images. That’s the second step of the slidebook setup. Upload images, import YouTube videos, or import images from Google image search. Drag and drop the image to the right and click Next. Before that you’ll need to select the type of slidebook that you’ll be creating.
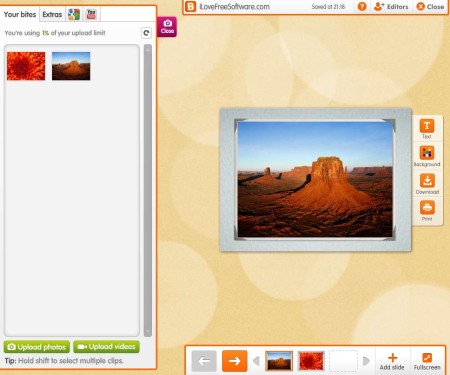
Conclusion
Service offered by BitSlide is great, not just for teachers and students, but also for anyone who needs to share information with colleagues and would like to do that with the help of interactive slide shows, slidebooks and presentations. Setup isn’t very difficult, and anyone can do it. Lots of features are available and if the free account isn’t enough for you, there’s an option for upgrade where you get more.