This tutorial demonstrates how to set account lockout duration in Windows 10. By default, Windows 10 comes with a feature which automatically locks your PC (for the current account) for 30 minutes after it reaches the maximum number of failed login attempts. The number of failed login attempts is not constant as you can also define the total number of failed login attempts in Windows 10 manually. No matter how many failed login attempts you set, your PC will still get locked for 30 minutes. But, what if you want to change the account lockout duration in Windows 1o?
Well, this is what the tutorial is all about. In this tutorial, I will explain the steps which you need to follow to set a custom account lockout duration by replacing the default duration of 30 minutes. You can set the custom duration for 1 minute, 2 minutes, 5 minutes, and so on. This can be done using “Local Security Policy” option in Windows 10.
How To Set Account Lockout Duration in Windows 10:
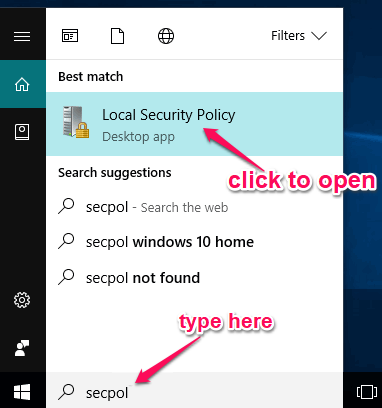
Step 1: To get started, the first thing you need to do is open up “Local Security Policy”. For this, simply type “secpol” in the search bar at the bottom and then click on the “Local Security Policy” option.
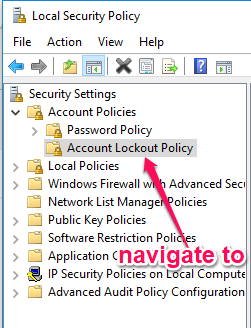
Step 2: When the “Local Security Policy” opens up, simply navigate to “Security Settings → Account Policies → Account Lockout Policy” folder.
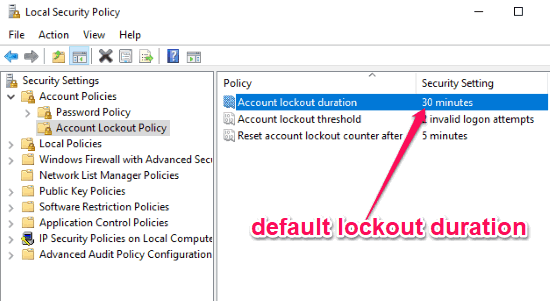
Step 3: After that, click on the “Account Lockout Policy” folder on the left panel. As soon as you do that, you will be able to see three different options on the right panel, named: “Account Lockout Duration”, “Account Lockout Threshold”, and “Reset Account Lockout Counter After”. On the right of the “Account Lockout Duration”, you will see the default duration as 30 minutes under the “Security Settings”.
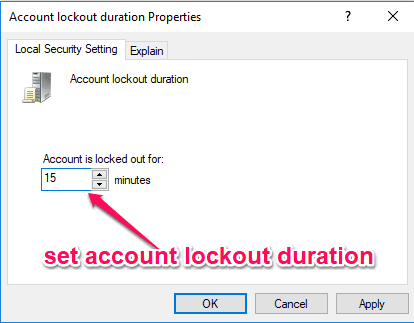
Step 4: Now, to manually set the account lockout duration, simply double-click on the “Account Lockout Duration” option. When you do that, a new window will appear where you will see an input field named, “Account is locked out for” under the “Local Security Setting” tab. You can now enter any custom value you want for the lockout duration. After that, you can click on “Apply → OK” to save the changes which you have made.
From now on, whenever the failed login attempts reach the limit, your PC (for the current account) will be locked until the time assigned by you runs out.
Closing Words:
These are some of the steps which you need to follow to set account lockout duration in Windows 10 manually. The best thing is that you don’t need any third-party software to do this. The built-in “Local Security Policy” feature of Windows 10 allows you to do the same with ease.
I hope you find this tutorial useful.