This tutorial article explains how to prevent access to some (or all) of the Control Panel settings (Action Center, Mouse etc., also called modules), using the built in Group Policy Editor feature in Windows. You can use the Group Policy Editor to either completely disable the Control Panel, or have it show (or hide) only selectively specified settings. This can come in really handy in certain situations, like when you have to leave your Computer with someone you don’t want messing around with sensitive system settings (say, kids) and similar scenarios. Sounds exciting, doesn’t it? Keep reading to find out more!
Important Points:
- This tutorial involves accessing Group Policy Editor, which is a critical built in module of Windows. So make sure you know what you’re doing before digging in, or you may end up with a PC that refuses to even boot up.
- For most of the tweaks outlined in this tutorial article to work, you need to have at least Windows 2000 installed. However, I’d say that it’ll be good if you have at least Windows XP (or later).
- The Group Policy Editor only ships with certain editions of Windows OS versions only (For example only Ultimate, Professional & Enterprise are supported under Windows 7, and only Pro under Windows 8). So if you are not able to find Group Policy Editor in your Windows, it is probably because it didn’t come with it.
If Control Panel is your subject of interest, you will probably also like to read How to Add Control Panel Items to My Computer.
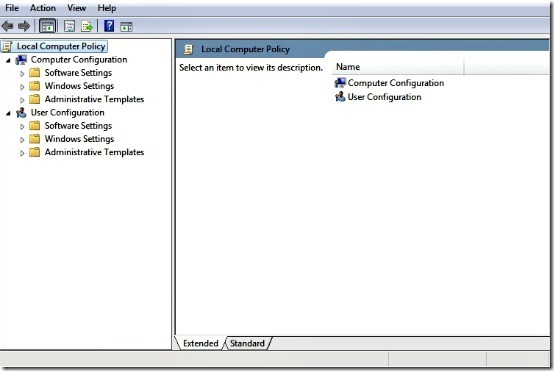
Accessing Group Policy Editor and navigating to the target section
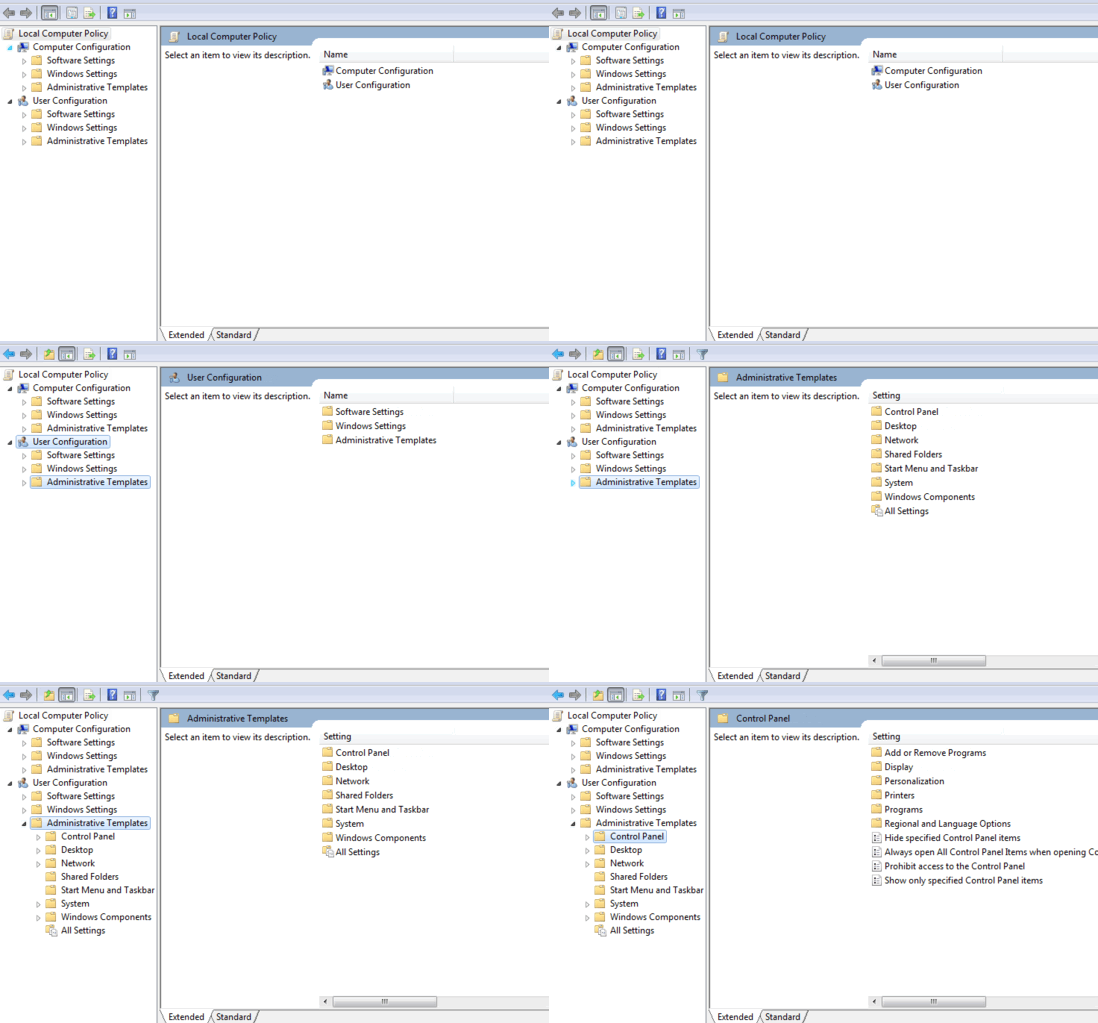
Step 1: Open up Group Policy Editor by either searching for it via the Start Menu, or typing gpedit.msc at the Run prompt and pressing the Enter Key.
Step 2: From the left pane, double click Administrative Templates under the User Configuration section to expand it.
Step 3: Select “Control Panel” from the expanded sub-folder view.
Check the following animated graphic for reference:
How to hide specified Control Panel items (or modules)
The animated graphic below shows all the steps. You can read the steps in detail below the graphic:
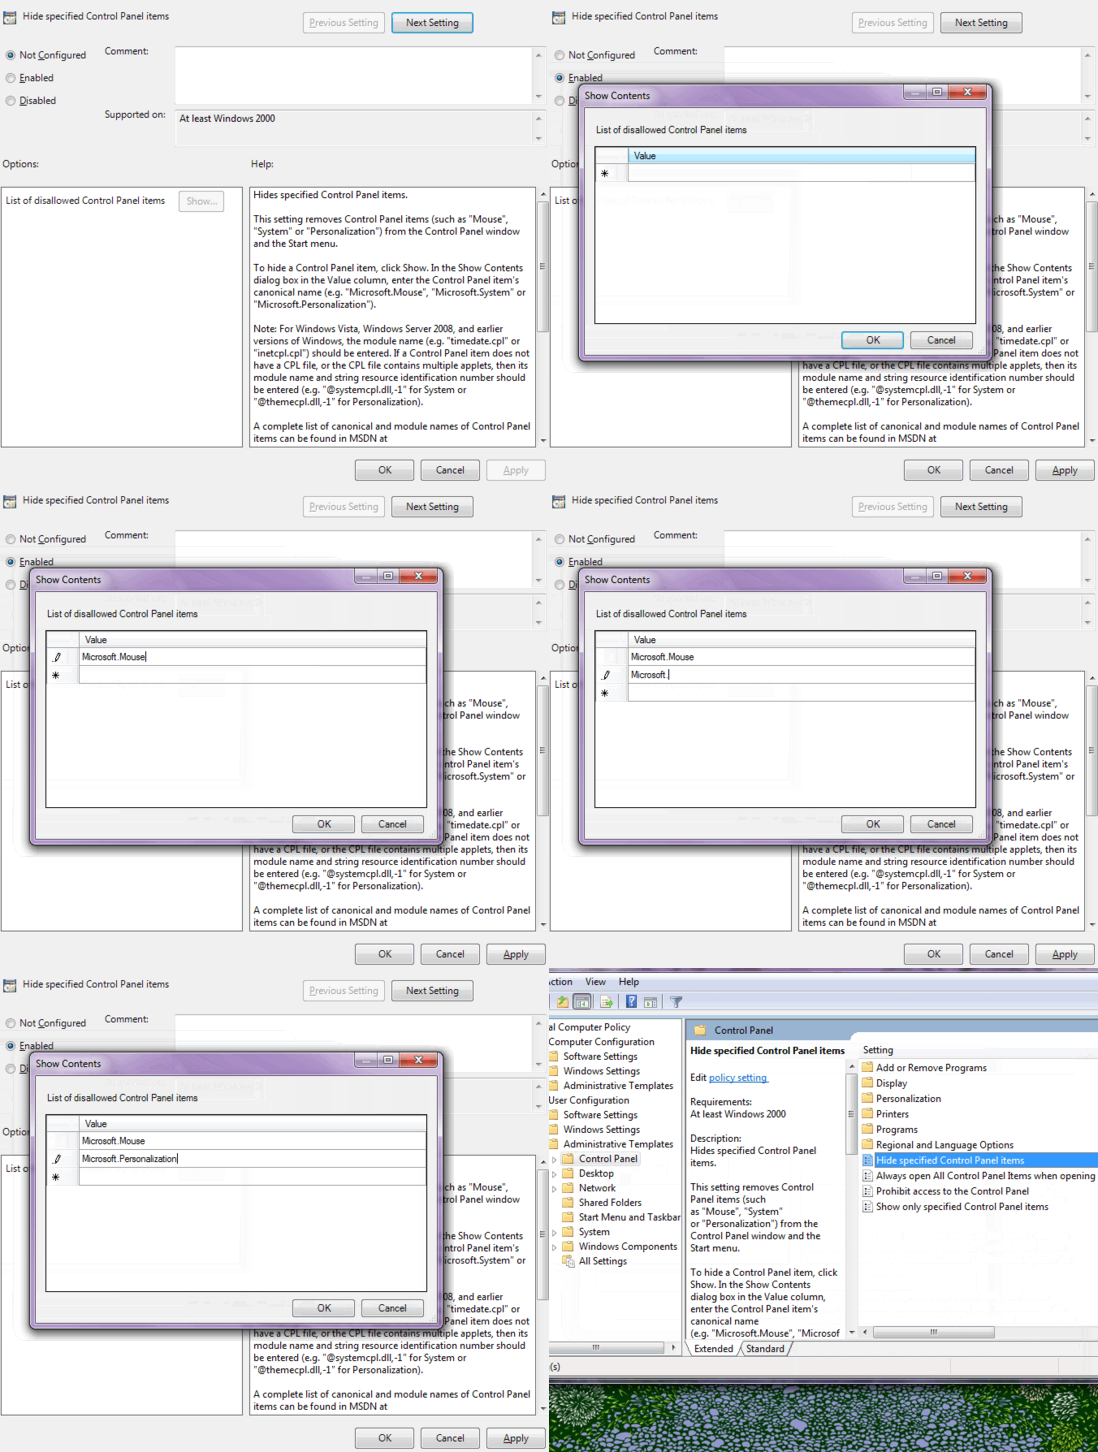
Step 1: In the right pane, double click the item that says “Hide specified Control Panel items.”
Step 2: A configuration window pops-up. It has three radio buttons at the top left: Not configured, (the default selection), Enabled, and Disabled. Select Enabled.
Step 3: Check for a small button that says “Show” besides the text “List of disallowable Control Panel items.” (It is on the left, under a box with the heading “Options”).
Step 4: Another window pops-up that lets you list the Control Panel items that you want to hide. Enter the canonical names of the items you want to hide (for example, type Microsoft.Personalization to hide the Personalization module from the Control Panel etc.). You can also use the text that appears in the right side box for help. Also, note that for some earlier Windows versions, you need to enter actual module names, complete with the extension (*.cpl). You can find most of them here. You can see some here as well. If you don’t, do a bit of Googling (or Binging).
Step 5: Once you’re done adding the names of the modules you want to block, press OK, then Apply in the preceding Window and close Group Policy Editor.
That’s it! Now go check your Control Panel to see the difference!
How to show only specified Control Panel items (or modules)
This setting does the opposite of what the previous one does, it lets you show only specific control panel modules, while hiding everything else. Here’s how to do it:
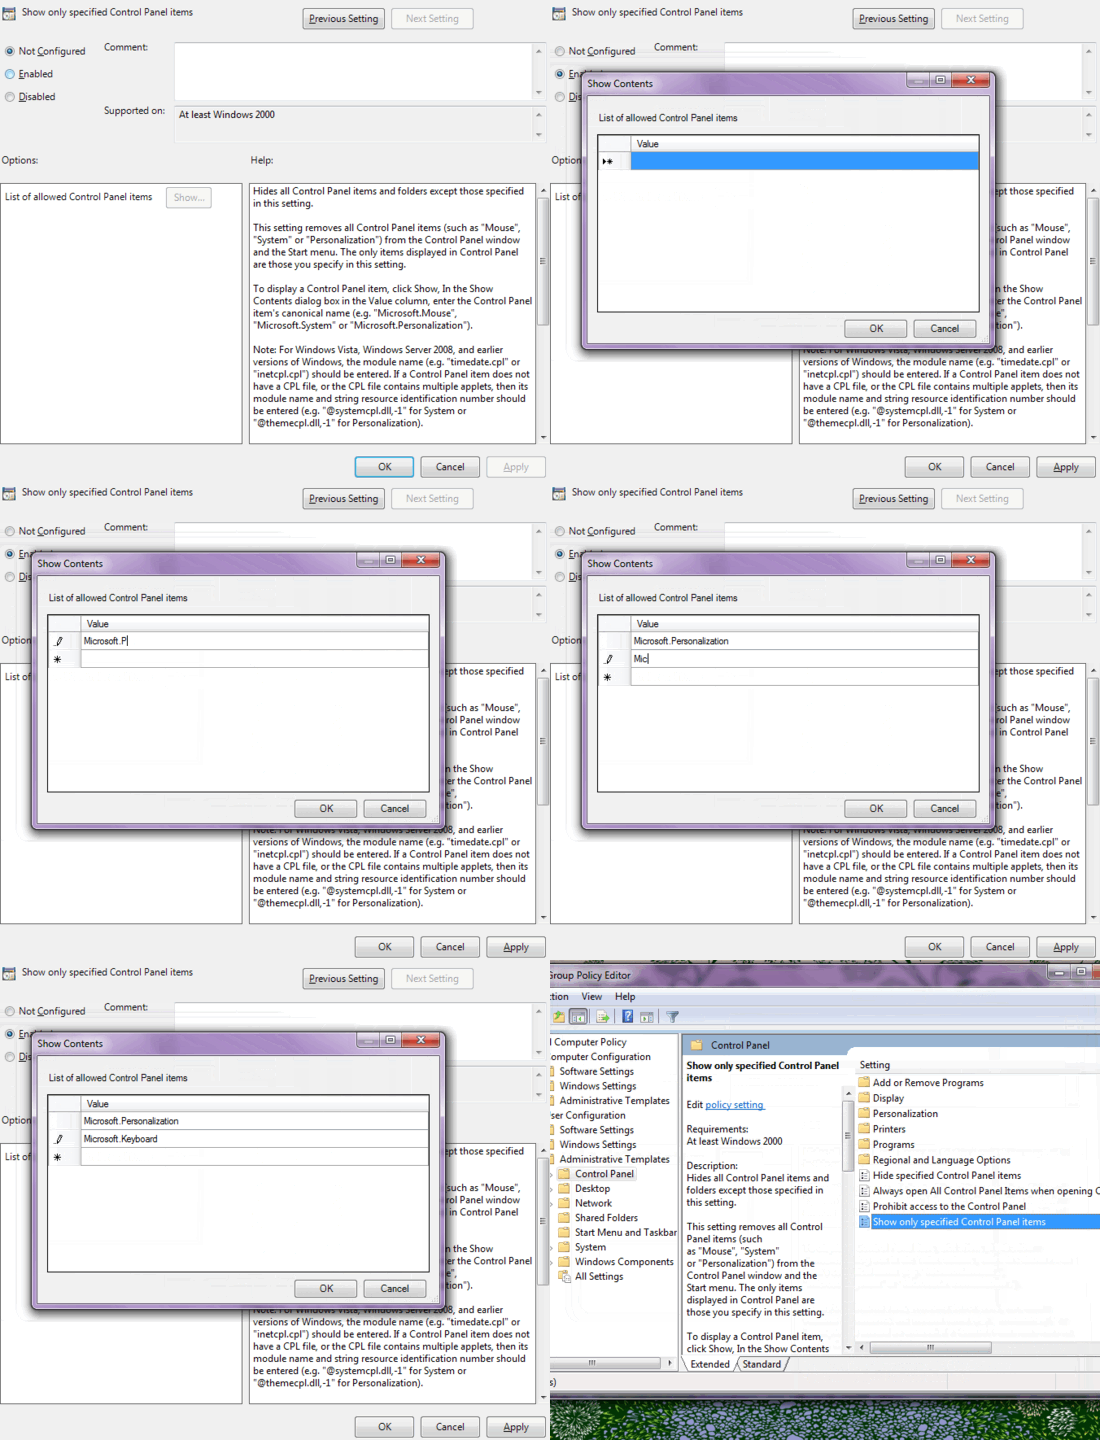
Step 1: In the right pane, double click the item that says “Show only specified Control Panel items.”
Step 2: Same as the one in the previous setting.
Step 3: Check for a small button that says “Show” besides the text “List of allowable Control Panel items.” (It is on the left, under a box with the heading “Options”).
Step 4: Same as the one in the previous setting (only this time, the items being added to the list will be the ones shown, instead of being hidden).
Step 5: Once you’re done adding the names of the modules you want to show, press OK, then Apply in the preceding Window and close Group Policy Editor.
Check the Control Panel to see the difference!
How to block access to the entire Control Panel
If you’re too much worried about others accidentally messing around with the Control Panel, you can block it entirely. This is the most secure setting, and will restrict anyone from accessing Control Panel. Furthermore, it removes Control Panel from everywhere in the System (Explorer, Start Menu etc.). Pretty cool, don’t you think? Here’s how to do it:

Step 1: In the right pane, double click the item that says “Prohibit access to the Control Panel.”
Step 2: Same as the one in previous two settings (Check the radio button that says – Enabled).
Step 3: That’s it. Press Ok, and then Apply. Since this setting blocks access to the entire Control Panel, you don’t have to add specific modules to any list(s). When done, close Group Policy Editor.
Now try accessing the Control Panel (that is, if you can even find any reference to it!).
Bonus: How to have the Control Panel display all items (and not categorize them) by default.
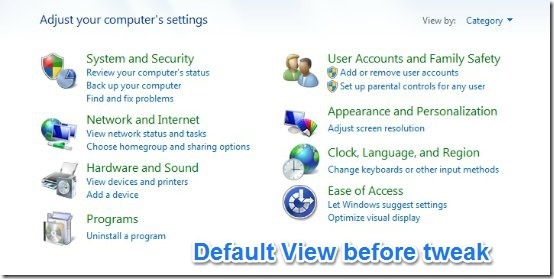
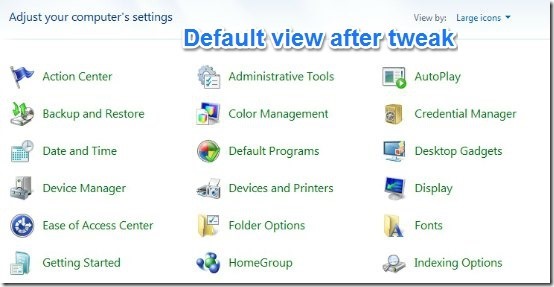
Although it’s not a major issue, but I believe some people find it irksome that Control Panel always displays its items under categories every time it’s opened. Besides, changing the display settings every time you open it is kinda annoying. But you can change the default view to have Control Panel show all items every time. Here’s how to do it:
Step 1: In the right pane, double click the item that says “Always open all Control Panel items when opening Control Panel.”
Step 2: As in all the settings previously detailed, simply selected the radio button that says Enabled. Click Apply, then OK.
Now open Control Panel to see the difference!
Before:
After:
How to revert the changes made by the above mentioned tweaks?
That’s really simple. Follow the same steps to navigate to the Control Panel section in Group Policy Editor, and only this time, check the radio button that says “Disabled”. Easy-peasy!
Conclusion
Control Panel is obviously one of the most important (and powerful too!) system modules of Windows, but that’s also the reason it needs to be handled with care. This tutorial lets you easily see which items you want to see in Control Panel and which items to disable in Control Panel. This should leave your Control Panel much safer than before.
