Here is a very simple tutorial to explain how to take screenshot of lock screen in Windows 10. In the following tutorial, I will talk about two different methods that you can use to take screenshot of the lock screen in Windows 10. The first method of capturing the lock screen is very simple and does its work without relying on any software. While, the other method relies on a third party software to do the same. Both these methods do have a difference that you will see in the tutorial later.
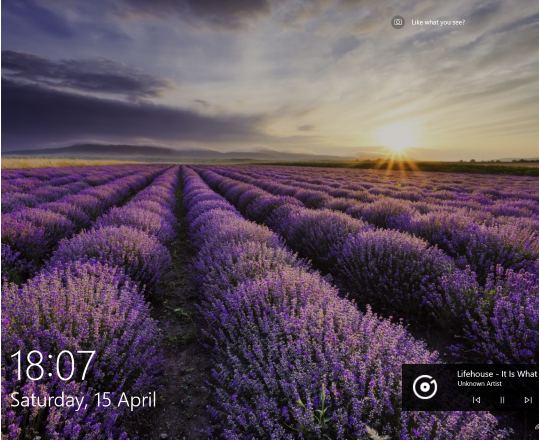
You do not need to use these methods to get beautiful images that Microsoft displays on lock screen, as there is spotlight images saver tool for that, but if there is anything else on lock screen that you want to take screenshot of, then this tutorial will be useful.
Previously we have done articles about taking the screenshot of logon screen in Windows 7 and Windows 10. And to do the same with the lock screen of Windows 10, I have come up with this tutorial. So, let’s see what it takes to capture lock screen in Windows 10.
How to Take Screenshot of Lock Screen in Windows 10?
Method 1: Screenshot lock screen in windows 10 using the Print Screen key
The very first method, that I will tell you is very simple and doesn’t require any additional software to be available on your PC. Using this method, you can take screenshot of lock screen using the Print Screen key of the keyboard. However, the method will only work for logged in users. If you try to use this method when your computer powered on, then it will not work.
So, in order to make this method to work, lock your PC using the Win +L keyboard shortcut. And when the lock screen appears, hit the Print Screen key. After doing this, the screenshot of lock screen will be saved to the clipboard. Then unlock your PC, and open paint or any other image editing software and paste it. You will see the captured lock screen in the image editor; you can save it.
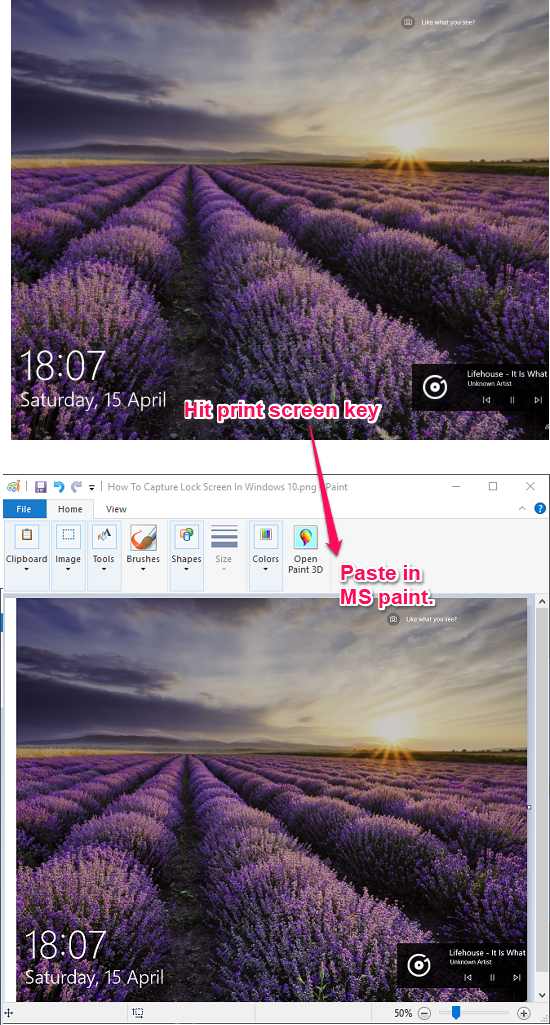
So, it is a pretty handy method to take screenshot, but requires you to be logged on the PC. And do remember that, as the screenshot first copied to the clipboard so don’t copy anything in between the process, otherwise the screenshot will be lost.
Method 2: Screenshot lock screen in Windows 10 using a free Software:
In the first part of the tutorial, I have told you about a very handy method to take screenshot of the lock screen. But, there’s a limitation in it that it requires a user to be logged on in order to work. But, in this method I will explain about a free software called EOAR, acronym for Ease of Access Replacer that can do the same and doesn’t require a looged in user.
The EOAR software makes it pretty easy to capture lock screen in Windows 10. The software actually modifies the Ease of Access button’s menu and adds an option there to take screenshot of lock screen in Windows 10. Not only, capturing the lock screen, but the software also allows you to open Task Manager, Command Prompt right there on the login screen.
So, follow these steps to capture lock screen in windows 10 using EOAR freeware.
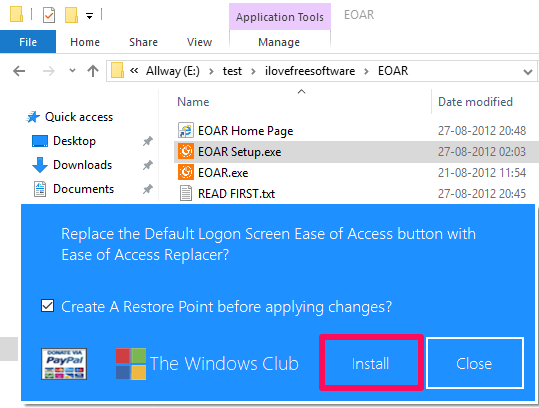
Step 1: Download the ZIP package of the EOAR freeware from its main website. Next, extract it and lunch the EOAR.EXE file with administrator rights. After that, installation window of EOAR will pop up. Hit the Install button to install it.
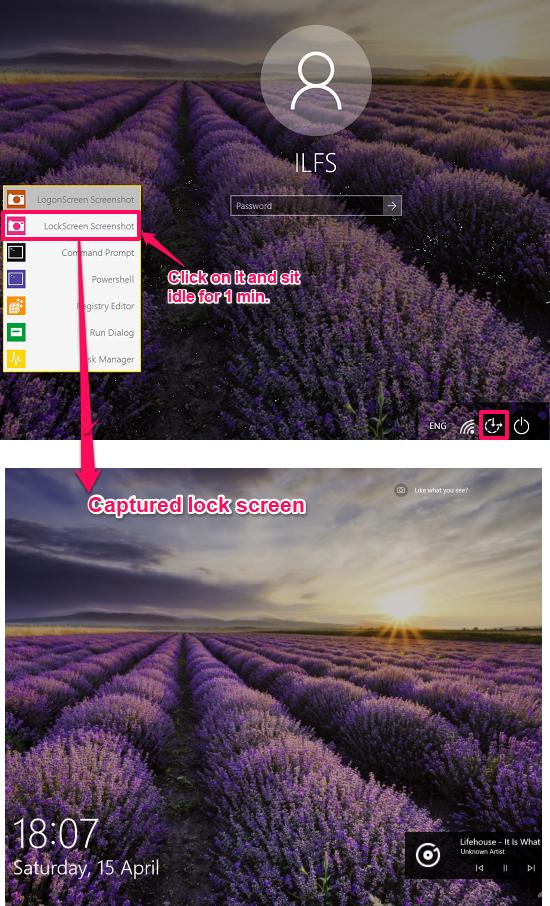
Step 2: After EOAR successfully installed on your PC, then you can lock your PC and click on the Ease of Access button from the logins screen. Choose LockScreen Screenshot option from the menu that appears. Now, after clicking on the LockScreen Screenshot wait 1 min for lock screen to appear. But do note that, there shouldn’t be any mouse movement or key press activity. Now, when the lock screen appears, the screenshot will be captured automatically and saved to C:\Screenshots folder.
This is the one of the best method to capture lock screen in Windows 10. And the method is pretty handy to use and takes away the limitation of the method that I explained earlier. You don’t have to be logged on, in order to make this software work.
Conclusion
In the tutorial above, I have listed two very easy methods to screenshot lock screen in Window 10. Both these methods are easy to use, but differ with each other in someways. The first method doesn’t rely on a software while the second one does. So, depending on what suits your needs, you can try any of the above method and capture lock screen.