This tutorial explains how to track time spent on Jira issues automatically. Jira doesn’t have any native option to track time that you spent on any issue. That means the only possible option you would have is to either use the free time tracking software or websites to manually create tasks (for Jira issues) and then track time spent on them. But not anymore, as I have found a simple way which can help you track time on issues directly from Jira. This can be done with the help of a third-party integration named, “TimeCamp“.
It is actually a free time tracking service which you can easily integrate with Jira and start time tracking for issues. It comes with a built-in timer that can track the time automatically. It lets you start the timer for individual issues and then track your work time on them separately.
So, let’s see how to use it for the job.
How to Track Time Spent on Jira Issues Automatically:
To get started, the first thing you would need to do is create a TimeCamp account and integrate it with Jira. To do that, all you gotta do is visit this integration link and then install TimeCamp on Jira. As soon as you do that, you can proceed to track time spent on Jira issues right away.
First, browse your Jira account and then create or open any of your existing projects. After that, create a new issue for which you want to track the time. You can do that by clicking on the “+” button on the left panel or on the board lists. You can also select your previous issues if you want.

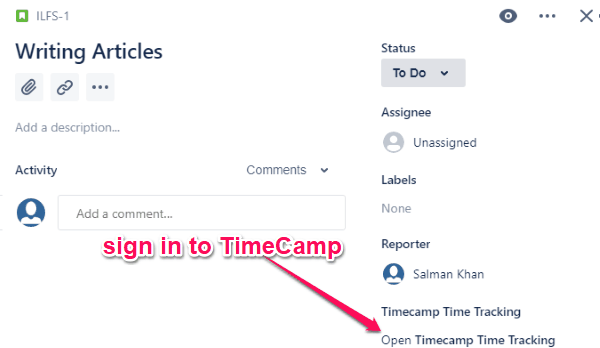
Once you’re done creating an issue, simply click on it to open the issue editor. On the right, you will see an option named “Open TimeCamp Time Tracking” which you need to click and sign in to your TimeCamp account.
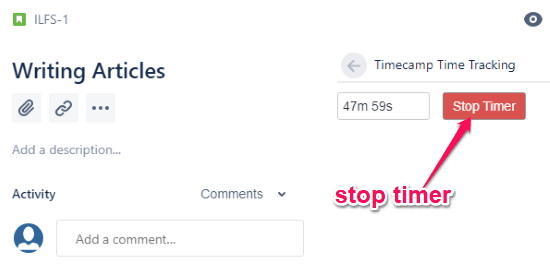
As soon as you do that, you can start tracking the time you spent on that Jira issue. For starting the timer, you would need to click on the “Open TimeCamp Time Tracking” again and select the “Start Timer” button.
![]()
As soon as you do that, it will automatically track the time you spent on that Jira issue. When you’re done with working on the issue, you can open the same option and click on the “Stop Timer” button to stop time tracking.
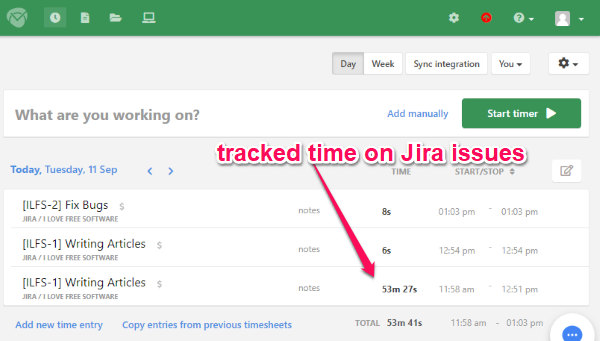
Now, to see the tracked time, you would need to open your TimeCamp dashboard. After that, you can browse the “Timesheet” tab or the “Projects” tab to see the time you have spent on the Jira issue. Similarly, you can create as many Jira issues and track time that you spent on them automatically. It will also show the total time you have worked on all the Jira issues.
Closing Words:
If you have been looking for a way to easily track the time that you spend on Jira issues, then the method explained in this post is the probably the best option you have. The TimeCamp integration makes tracking time on Jira issues a breeze for you. The best thing is that you can track time for as many issues as you want for free.