Even though modern day laptop batteries are fairly efficient, what if you could squeeze a bit more out of them?
Turns out, you can, via the built-in battery saver functionality of Windows 10. As its name suggests, battery saver lets you conserve your portable computer’s battery power by disabling functions such as background running apps and push notifications. Interesting? Head over to the other side of the break to see how you can enable battery saver in Windows 10.
How To Enable Battery Saver In Windows 10?
Turning on battery saver in Windows 10 is a cakewalk, and takes nothing more than a few mouse clicks. Here are the detailed steps:
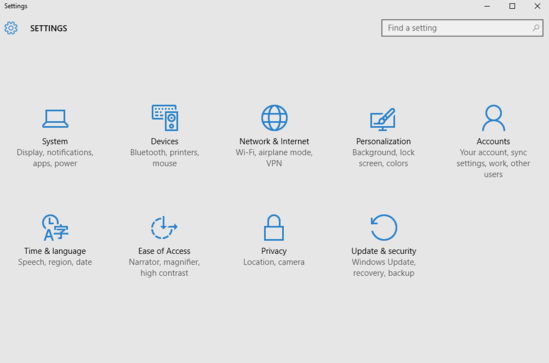
Step 1: Launch Settings, and click on the System sub-module.
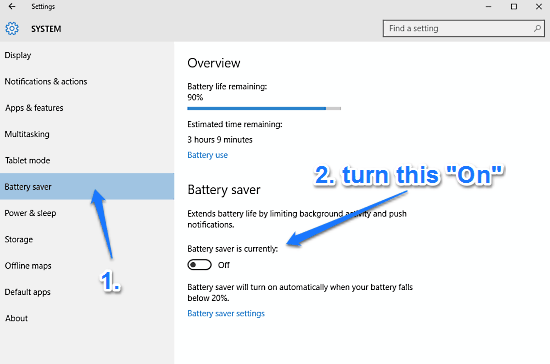
Step 2: A bunch of settings will now be displayed in the left column. Click on Battery saver, and jump on to the right. Finally, under the Battery saver sub-section in the right pane, turn the virtual toggle button marked with the words “Battery saver is currently” to On. Take a look at the image below:
That’s it folks. Going forward, Windows 10 will automatically activate the battery saver feature, every time your portable computer’s battery level falls below 20%. You can also configure advanced Battery saver settings here. How cool is that?
Also See: How To Get Colored Window Title Bars In Windows 10?
Wrapping Up
Battery saver is a simple yet hugely useful feature of Windows 10, and can come in really handy when you need to squeeze out a few extra minutes of your laptop’s battery. Give it a shot, and let me know your thoughts in the comments below.