Genial.ly is a free online application to create interactive images by adding links, tooltips, and window popup. That means you can place pins on your images and assign them to open tooltips, links, and a window popup. Using this application, you will be able to create presentations by adding multiple slides with interactive images, infographics, interactive posters, etc. It even allows you to add a pin on images and assign it to open another slide on the same presentation. Similar to another application called Thinglink, you’ll be able to add hyperlinks and redirect others to any website you want right from your images.
You can either start from scratch or use dozens of predefined templates for creating interactive images. To make your presentations with interactive images more impressive, it lets you add text, beautiful backgrounds, GIF from Giphy, illustrations, icons, and many other custom contents like audio, videos, code, charts, articles, maps, and more. It also has the option to invite others on your presentations for collaboration.
Note: The free version doesn’t allow you to download the interactive images as HTML5 or PDF files. However, you can share your work with others via URL, Email, and Social Networks.
How to Create Interactive Images by Adding Links, Window Popup, and Tooltips:
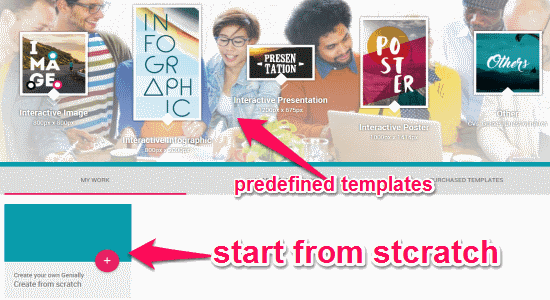
Step 1: Visit the homepage of Genial.ly and sign up to start creating interactive images. At first, the main window will appear where you’ll see various predefined templates for an interactive image, infographic, presentation, poster, and others. You can select any template to get started or use the “Create from Scratch” button at the bottom to start with a blank canvas.
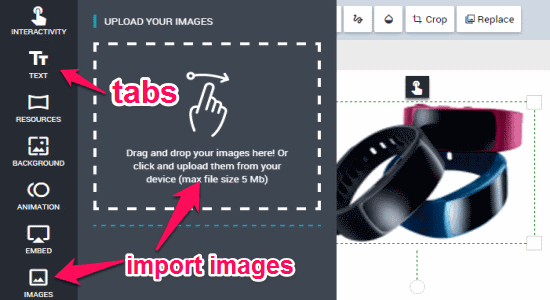
Step 2: Let’s say you’ve selected “Create from Scratch” button, then it will ask you to give the interactive image a name and define the canvas width & height. After that, the editor will open up with various tabs on the left panel named, Interactivity, Text, Resources, Background, Animation, Embed, and Images. Go to the “Images” tab to import and insert an image from your PC. Once you’ve imported an image, simply drag it to the canvas to start making the image interactive. You can also click the image to change the opacity, apply effects, position the image anywhere on the canvas, and more.
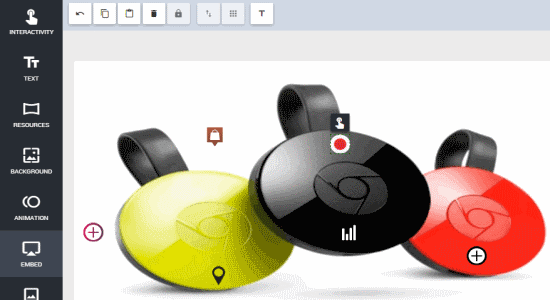
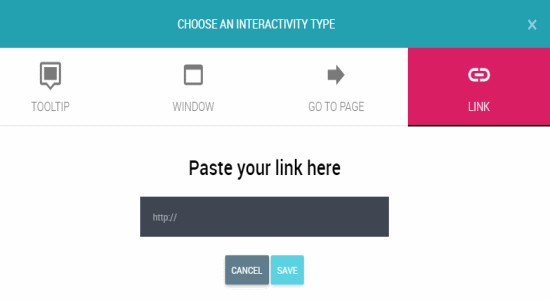
Step 3: Now, you can either directly make the entire image interactive by adding links, tooltips, window popup, and “go to page” action or you can add small pins on the image to do the same. If you want to make the entire image interactive, then click on it once and select the small “Touch” icon at the top of the image as shown in the above image. After that, a new window will appear with 4 different options named, Tooltips, Window, Go To Page, and Link. You can select any of the options and fill up the details required.
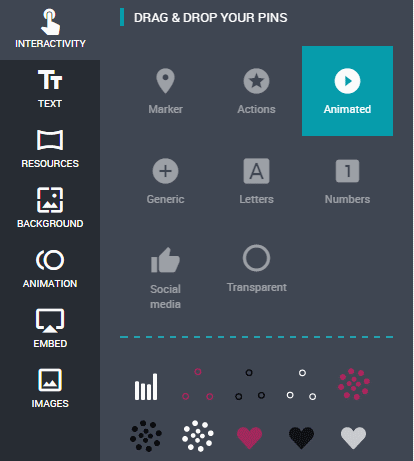
Step 4: Remember, you can only choose one option for making the entire image interactive. However, adding small pins on the image will allow you to add multiple interactive options. For this, go to the “Interactivity” tab and you will see various pin options like Marker, Actions, Animated, Generic, Letters, Numbers, Social media, and Transparent. Each option comes with multiple pins with different icons and colors. You can simply drag and drop multiple pins on the image and add an interactive effect either as tooltip, window popup, link, and go to another slide action individually.
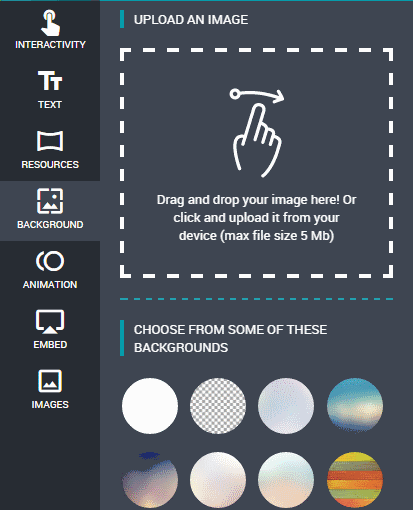
Step 5: When you’re done adding interactive actions on an image, you can add more slides to create a presentation with multiple interactive images. For this, click the “New Slide” button on the right panel of the editor. To make your images impressive, you can add text from “Text” tab and choose a beautiful background among dozens of predefined ones in the “Background” tab. It even allows you to import your own images as background.
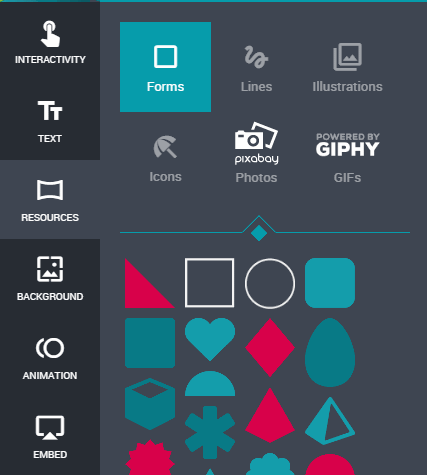
Step 6: It also lets you add illustrations, icons, GIF from Giphy, forms, lines, and photo from Pixabay on your interactive images. To add these objects, simply go to the “Resources” tab and choose whatever you want to add on the images. If you’ve added any animated pin on the image, then you can configure the object animation from “Animation” tab. You will also see an option to add animated transitions to the slides in case you’re creating a presentation.
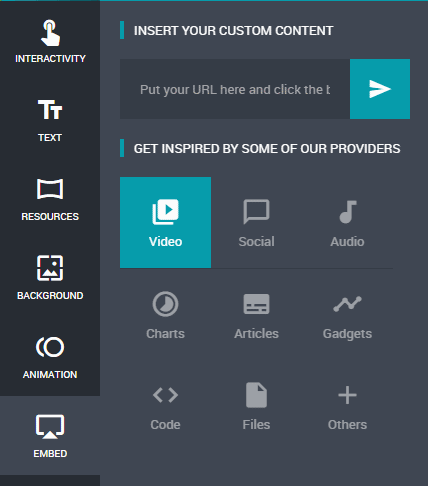
Step 7: Another great feature of Genial.ly is that it allows you to embed custom contents via URL such as videos, audio, social links, charts, articles, code, documents, maps, etc. on the canvas, along with your interactive image. All you need to do is go to the “Embed” tab and paste the content URL in the insert field. After that hit the “Arrow” icon and it will automatically insert the content to the canvas.
Step 8: If you want some assistance while creating interactive images, presentations, infographics, and posters, then you can invite your friends for collaboration. Click the “Menu” option a the top and select the option “Collaborative Work”. After that, simply enter any username or email id to invite the user for collaboration. Remember, you can only invite existing Genial.ly users for collaborating with you.
Step 9: The free version of this application doesn’t allow you to download the images in PDF or HTML5 files. But, when you’re done creating an interactive image, you can share it with the world via URL, Email, and Social Networks. To do this, click the “Share” option adjacent at the top and choose your preferred medium to share. Whenever others open your shared link they will be able to see the and access the interactive actions which you’ve added on the image. For example, if you’ve added a link, then they can click the pin and browse the assigned website. In addition to sharing, you can also embed the final image in your webpages, so that anyone can interact with them.

My Final Verdict:
Genial.ly is an amazing online application which can be easily used to create interactive images by adding links, tooltips, window popup, and go to page actions. There are dozens of other useful features like you can embed custom contents via URL, add GIF from Giphy, change backgrounds, add text & icons, illustrations, and much more. You’re going to love this application, give it a try.