Creating and hosting your own blog to show case you knowledge is kind of common these days. There are popular CMSs and hosting providers which people often use for some monthly fees to host a blog. A normal blog with average traffic can be hosted for around $3 per month. But if you can’t even afford that then you can host your blog for free as well and that is what I will be talking about in this post. Here I will talk about how to host a blog website for free using GitLab and Netlify. We will use GitLab to save blog/site data and will use Netlify for static website hosting. The free plan of Netlify is more than enough for individual bloggers who want to run an average online blog.
Netlify come with its own set of advantages which make it an ideal option for hosting. The biggest reason is the static hosting part that it has which helps you run a robust website whose pages load faster than the pages hosted on WordPress other CMSs. Also, here you can add your own domain for free and you also get free HTTPS support along with IPv6. You just have to spend around half an hour to configure the services and in the end you will get your blog up and running.
How to Host Blog for Free Using Netlify and GitLab?
Hosting your free blog with GitLab and Netlify is very simple. All you need is the free account on both these services and then you can get started. The whole process comprises of two parts. In first part, we will configure the GitLab to use as a store for blog pages. And the second part deals with configuring the hosting. If you follow these steps then you will be able to easily summarize the whole process.
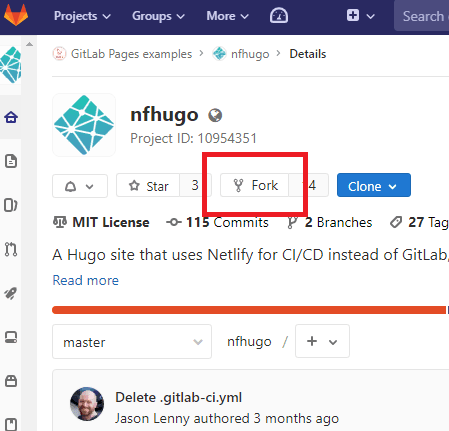
Step 1: Log in to your GitLab account and fork this repository. After forking it in your account, you have to remove the fork relationship by going to the Settings >Advanced > Remove the Forking Relationship.
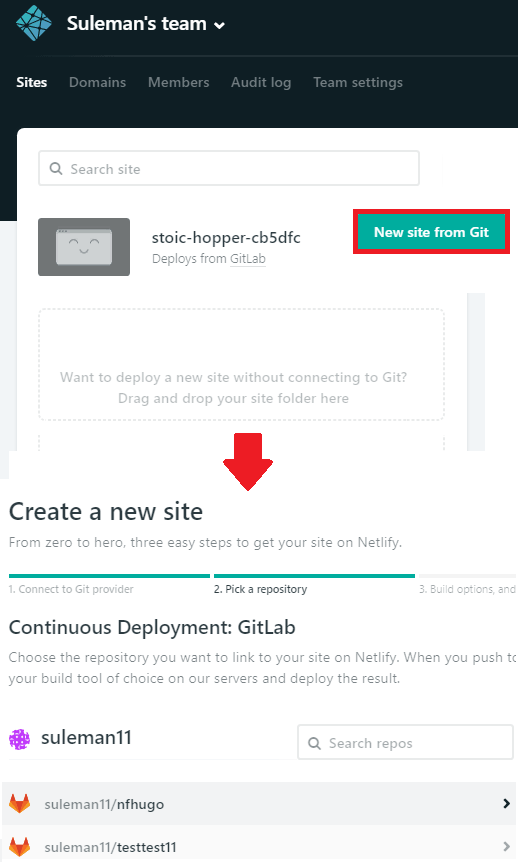
Step 2: Now, its time to serve the site from the repository you’ve just forked. Go to Netlify and then log in your account and choose New site from Git. Next, choose the GitLab option and then select the repository you have forked. Do note, after choosing the GitLab option it will ask permissions to access your GitLab account, so allow it.
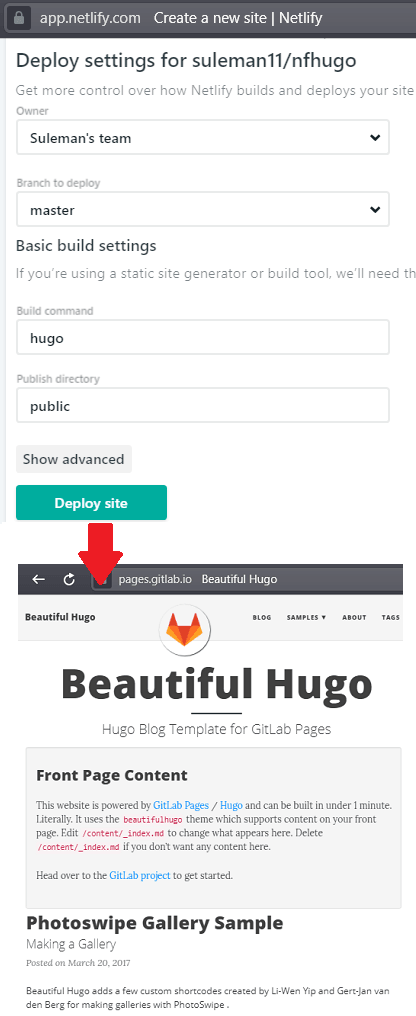
Step 3: Now, configure the build options and then complete the hosting process. In the build settings, leave the values to default and then it will create the site for you. It will assign some random domain name to the blog but you can change that from the site settings.
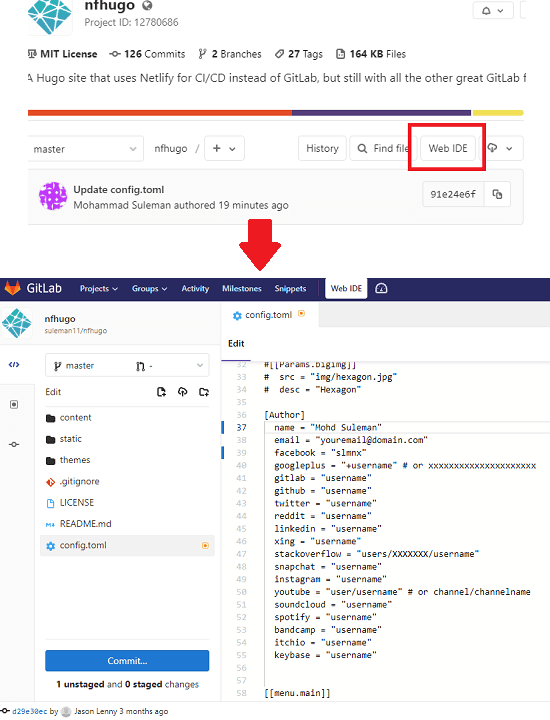
Step 4: At this point, your site is up and running. All you have to do now is customize a few things such as name of the site, add your personal information, social links, Google Analytics ID, and some other things. You have to configure these from the GitLab repository. You go to the GitLab repo again and choose Web IDE option and edit the “config.toml” file and fill all the fields as required.
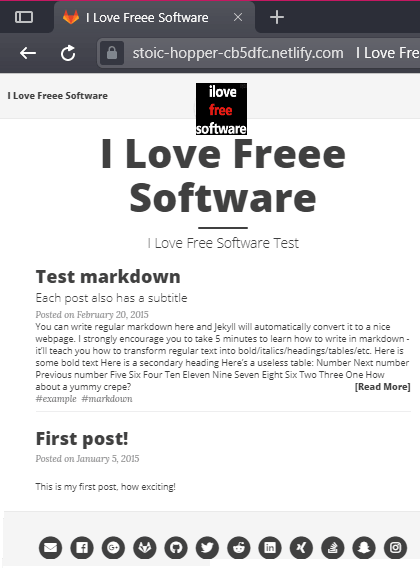
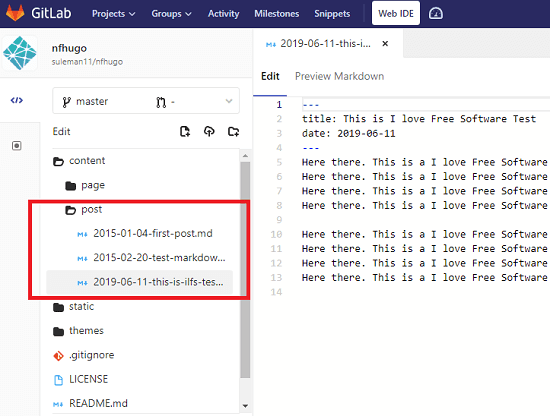
Step 5: This is the final step and here you have to start creating posts for the blog you have just created. Delete all the previous posts which are already in the “content” folder. Start creating your first post and to create a post, you will have to use the markdown syntax. Also, use the name of the files as shows in the sample posts. Commit your changes and they will be reflected on the main website automatically.
In this way, you can use host your own blog for free using Netlify and GitLab. You just have to spend some time in the beginning and then your ar done, just create a new post in GitLab, and it will be automatically updated on the site. Also, you can add your own domain and Google Analytics Tracking code there to see the site stats. Do note that, you have to change the site logo and name in the “config.toml” file and remove the “index.md” file from the content folder. Simple as that.
Similar posts:
- How to Migrate Medium Blog to Self Hosted Server
- Convert WordPress Hosting to Static Hosting using Netlify
Fina thoughts
If you are looking for free ways to host a blog then you have come to the right place. The above guide I have mentioned will be enough for you to do it on your own. And this is one of the best free methods available on the internet to host you own blog. I don’t know about how you add ads on the blog you create but this is a good option for running ad free blog. The default theme is very nice and website pages load at very fast speed as it is a static hosting.