This tutorial explains how to schedule tweets using Google Sheets. In the following tutorial, I will talk about a free and handy method that will let you send tweets from Google Sheets at scheduled time. And you can send as many tweets as you want and include images and hyperlinks in them as well. The tweet scheduler that I will talk about only requires the twitter API credentials for the account for which you will schedule the tweets.
If you are indulged in digital marketing, then surely at some point you need automation tools. And when it comes to Twitter, then what could be better than a free tool that will auto post your tweets at the specified time. And in the following tutorial, I will explain how to schedule tweets with Google Sheets.
There are already some services to schedule tweets. But, those services puts a limitation that you can only post limited number of tweets. And that’s why I have come up with this tutorial. Using this method, you will be able to schedule a lot of tweets (2400/day) with links and images.
How to Schedule Tweets Using Google Sheets?
There is a pre-ready Google Sheet available that you can use to send tweet automatically to your Twitter timeline. All you have to do is just follow the below steps to make it work.
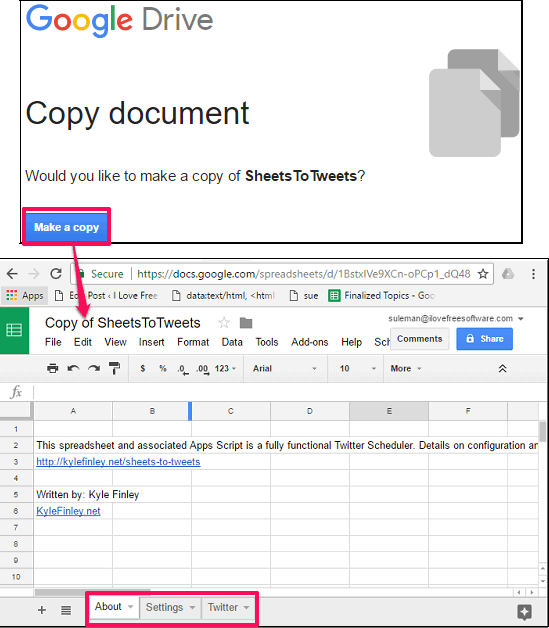
Step 1: Make a copy of this Google Sheet to your account. Then, open it and you will see three tabs at the bottom of this sheet. The tabs are Twitter, About, and Settings.
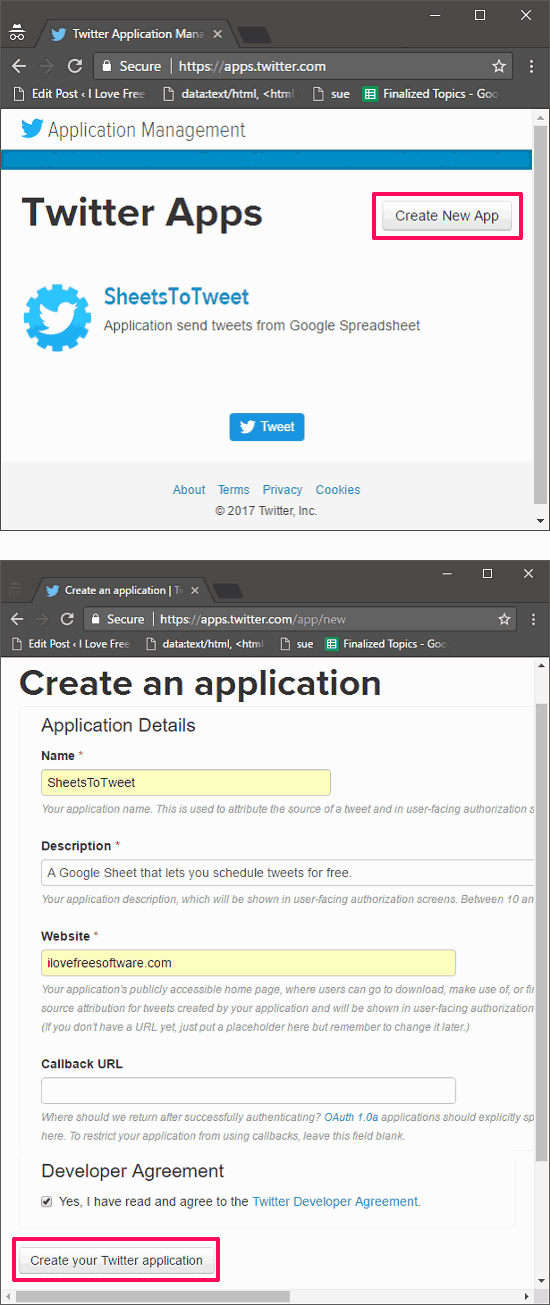
Step 2: Open the Twitter API webpage from here. After that, register an application there using your Twitter credentials. Next, you will be redirected to the page where you will have to enter some credentials like app name, website, description, call back URL (optional), etc. After specifying these, click on the Create your Twitter application button.
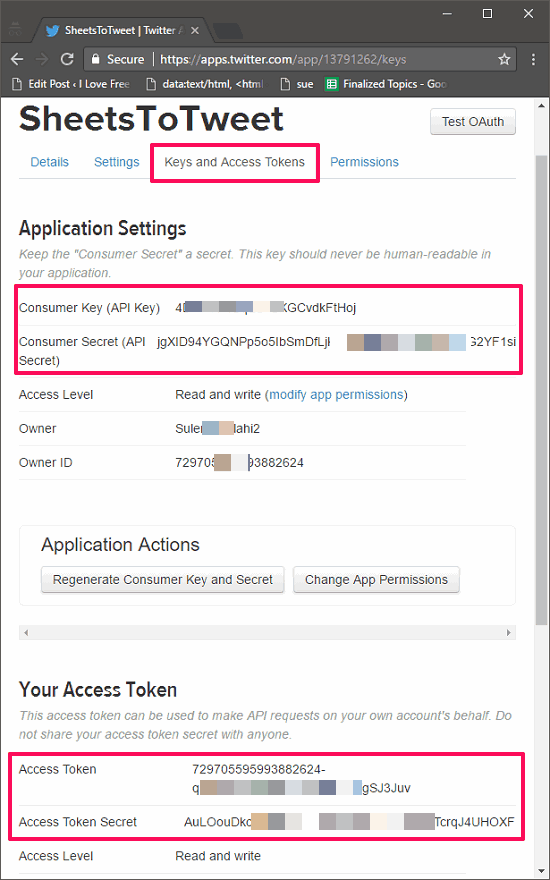
Step 3: Next, you will be directed to your Twitter application page. Now, navigate to the “Keys and Access tokens” section and copy down the Consumer key and Consumer secret to somewhere. Next, copy Access token and Access token Secret. If they are not already there, click the generate Access token button and copy them down too.
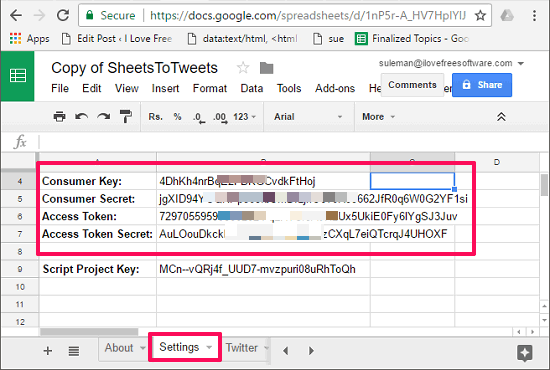
Step 4: Now, come back to the Google Sheet and move to its “Settings” tab. After that, fill the Consumer key, Consumer Secret, Access Token, and Access Token with the values that you have noted in step 3. Leave the Project key cell as it is. After typing the values “Scheduler” tab will appear in your sheet.
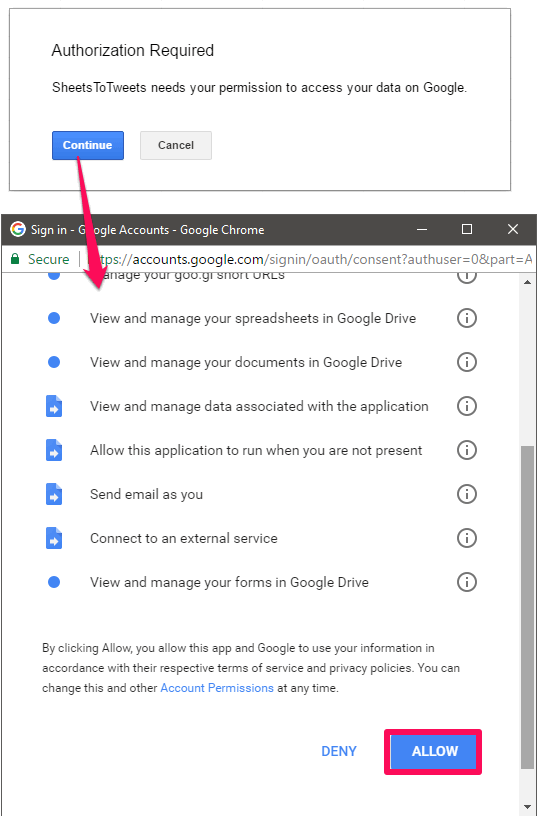
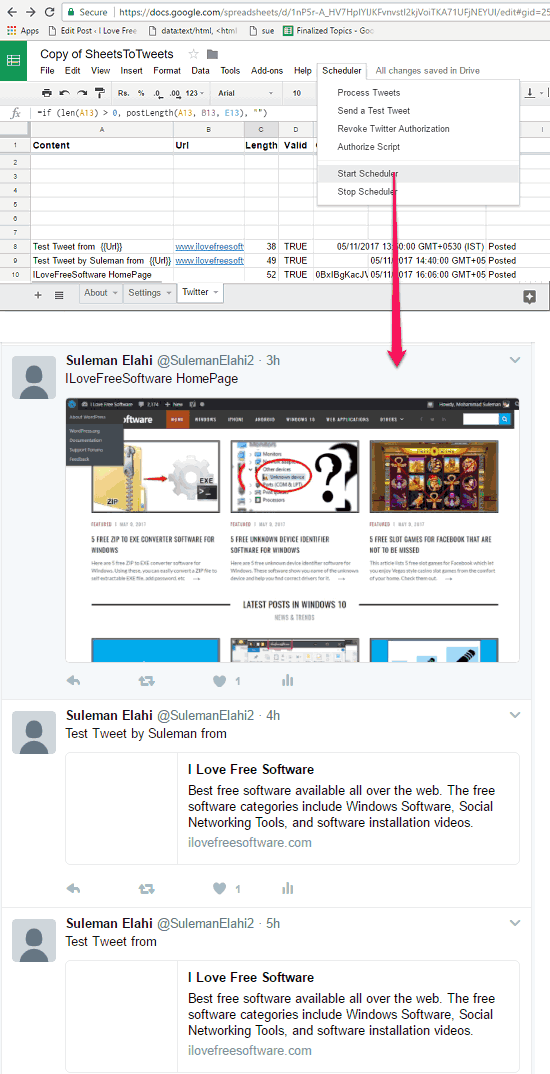
Step 5: Authorize your sheet to send tweets by clicking on “Authorize Script” option. This option is available in “Scheduler” tab of the spread sheet. After the successful authorization, the sheet will be able to schedule tweets.
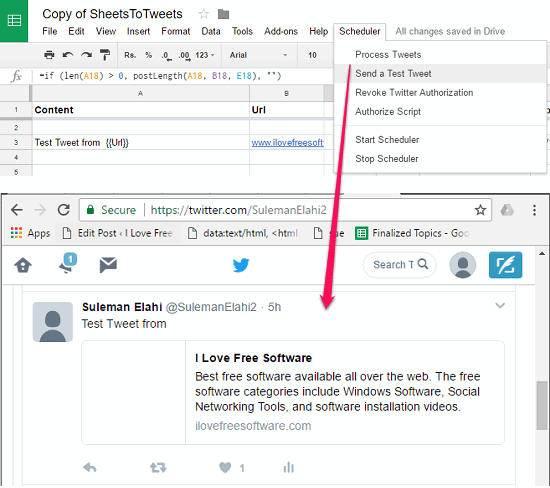
Step 6: Now, test the working of the sheet, by clicking on the Scheduler > Send a Test Tweet option. If the tweet is posted to your Twitter account, then it means the Sheet is working, you can now start using it to schedule tweets.
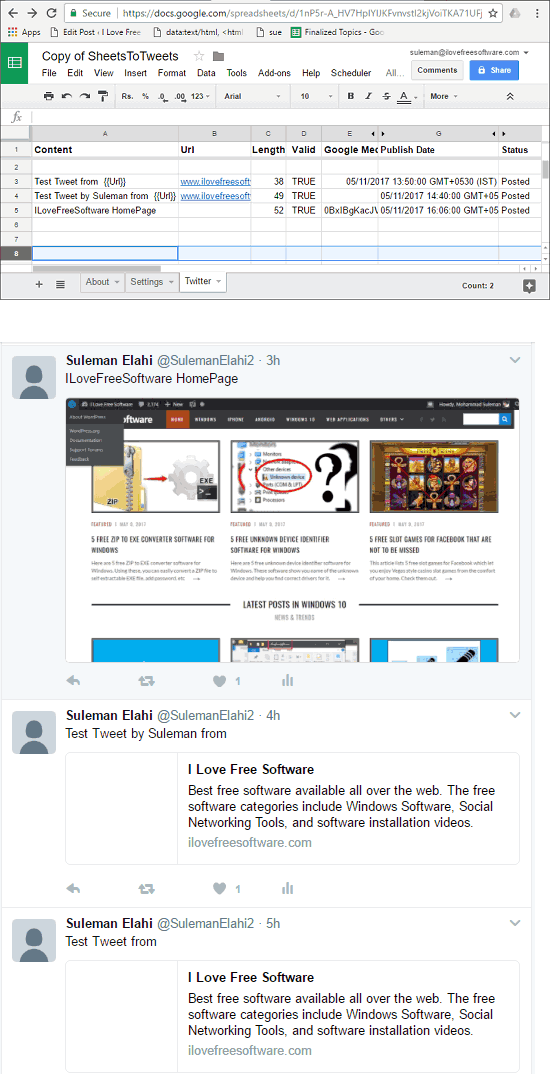
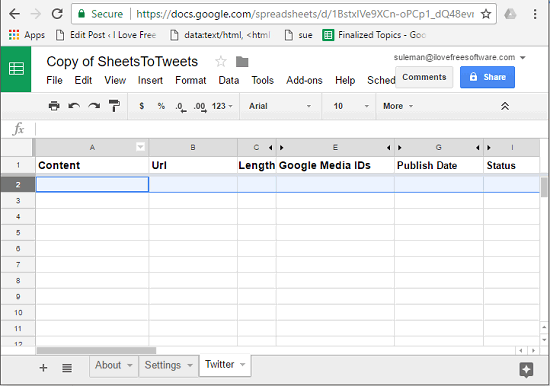
Step 7: To enter your tweets, move to the twitter tab of the Google Sheet. After that, you will see various fields there that you have to fill out and they are:
- Content: Here you will type your tweet. Do note that, the tweet should be less than or equal to 140 characters.
- URL: If you want to add a URL in your tweet, then you have to add the URL in this field. And the token “{{Url}}” token in the tweet text. One thing to remember is that, if you specify a link in URL field but don’t use it in the tweet text with the token, then an error will occur. And the same will happen if you do the opposite.
- Length: It will tell you the length of the tweet that you have typed.
- Google Media ID: This Google Sheet lets you add media that it will post along with the tweet. The media can be image, GIF, or a video available in your Google Drive. The media ID is a long string of text that is visible in URL of media on Google Drive. It could be something like this: “0BwmeHir3110wZmZqcUNXd3FHYVk”.
- Publish Date: Here you will specify the date and time at which it will send the tweet.
- Status: Here you will see the status of the tweet, whether it is posted or not.
Step 8: So, finally fill all the details and specify the time and start scheduler using the Start Scheduler option from the Scheduler tab of the sheet.
That is how you can easily schedule tweets using Google Sheets. You may find the process a bit lengthy, but it is a one time effort. And after that, all you have to do is just type you tweets and start the scheduler. It will then post your tweets on your Twitter time line.
Final Verdict:
Google Sheets makes it very easy to schedule tweets. This option is especially useful if you want to send same tweet multiple times. Just copy that tweet multiple times, and change schedule time for each of them.