This tutorial explains how to change the default installation folder in Windows. There is a simple registry tweak that helps you to change the default installation directory, which is generally C:\Program Files, to any other directory set by you. This tweak works in almost all versions of Windows. Also, you can again revert the changes in the same way that you will see in the tutorial below.
Changing default installation directory can be useful in case your C drive becomes full, then this method can come handy. Using this simple trick, you can change the installation directory in Windows very easily.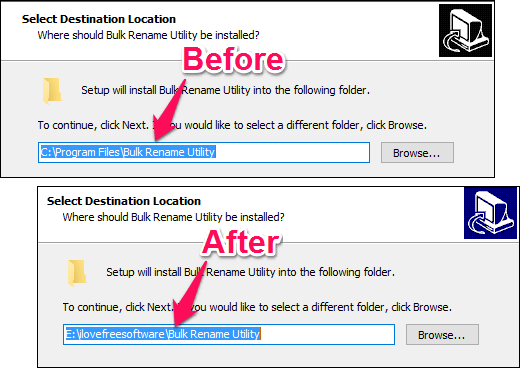
Let’s see how this registry tweak works to change the default installation directory in Windows.
How To Change The Default Installation Folder In Windows?
Using the following simple registry tweak you can easily change the default installation directory. Just follow these simple steps.
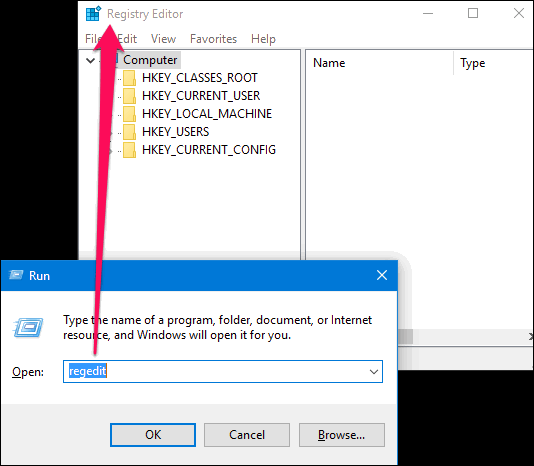
Step 1: Open Run using WinKey+R and type regedit in it and then simply press Enter. The Registry Editor window will pop up, you can see the below screenshot.
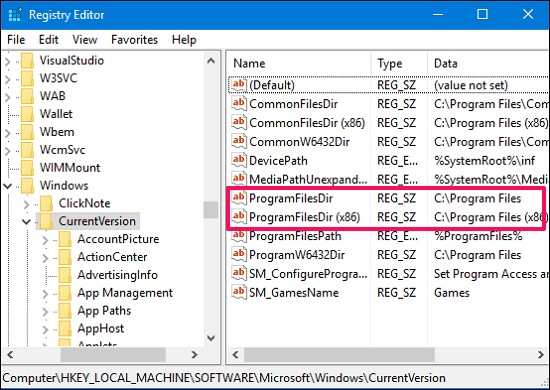
Step 2: Now, navigate to the following registry key:
HKEY_LOCAL_MACHINE\SOFTWARE\Microsoft\Windows\CurrentVersion.
Step 3: Now, double click the ProgramFilesDir entry. In case you are using a 64-bit version of Windows, then there will be two entries for that key namely: ProgramFilesDir32, ProgramFilesDir64.
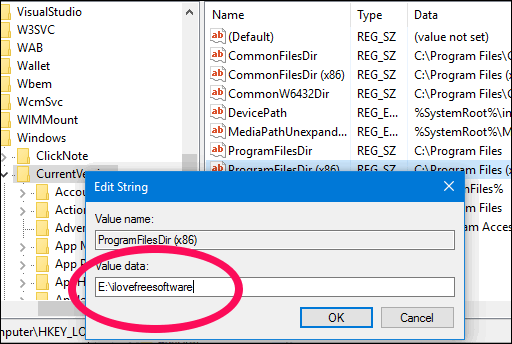
Step 4: A small dialog will pop up. In the Value Data field type the path of the folder that you want to use as your default installation directory, like in my case I have changed it to E:/ilovefreesoftware.
At this point, you are done changing the default installation directory in Windows.
Do note that you are making changes to one of the important resources of Windows, so it is advisable that you take a backup of the registry before making the changes. Another thing that is worth mentioning here is that in case of the 64-bit version of Windows, you will have to change the value data for both the entries that are ProgramFilesDir86 and ProgramFilesDir64 in order to make the desired settings to take effect. Or. you can change just one of them, if you want one of the default installation paths to remain as current, but change the other one.
My Final Verdict
Change the default installation folder in Windows is pretty easy using the above registry tweak. If you are looking for the same, then you have come to the right place. If you hate the fact that you have to change the installation directory’s path whenever you install new application. Then, using this simple tweak you can change the installation folder in Windows in just a few minutes.
Use this method to change the default installation folder in windows and, do let me know if you know some other ways out there to do the same.