In this post, you will learn about HubSpot Conversations. It is actually a new feature added to the HubSpot CRM application. This feature includes 3 different tools named Live Chat, Team Email, and Bots. The “Live Chat” tool allows you to add a free live chat widget to your website and communicate with the visitors from HubSpot dashboard with ease. This is just like the typical live chat services. Whereas, the “Team Email” tool lets you create a share team email inbox where you and your team members can read and reply to emails. And the “Bots” tool allows you to create free chatbots which can do the talking for you with the website visitors.
This new addition to HubSpot makes it very easy for you to convert website visitors to leads, get a hand in replying to emails from your team members, and more. There are many other useful features like snippets for creating canned messages, custom email templates, add website visitors as contacts, and so on. There are some limitations in the free version of HubSpot Conversations which we will see below in the post.
How to Use HubSpot Conversations and its Tools:
To get started, open HubSpot and then create or login to your free account. After that, you can see a “Conversations” tab at the top which will allow you to use all the newly added tools. Now, let me show you how to setup and use each tool offered by HubSpot Conversations.
How to Setup and Use Live Chat on your Website using HubSpot Conversations:
To get started, click on the “Conversation” menu at the top and select Inbox. After that, click on the “Chat” option on the left and hit the “Setup Chat” button. As soon as you do that, it will open up a wizard which will guide you through the steps for setting up the live chat on your website. The steps are as follows:
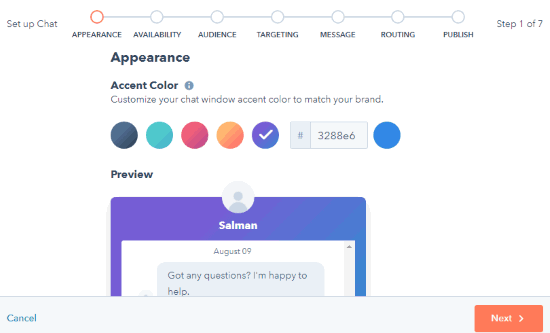
Appearance: This is the first step where you would need to configure the appearance of the live chat widget. You can change the accent color of the chat window such that it matches your brand. You can also see a preview of the chat widget before you add it.
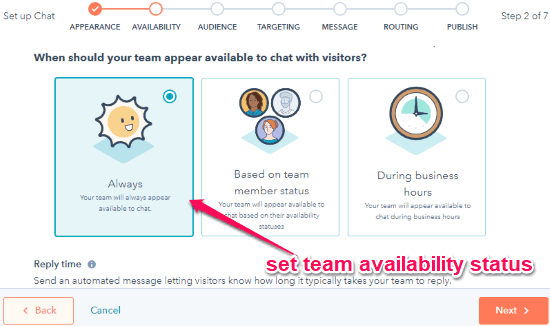
Availability: This step lets you define the availability status of your team to chat with visitors. You can either select “Always”, “Based on team member status”, or “During business hours” as the availability status. Apart from that, you can also set the “Reply Time” message which will notify the visitors how long it takes for your team to reply.
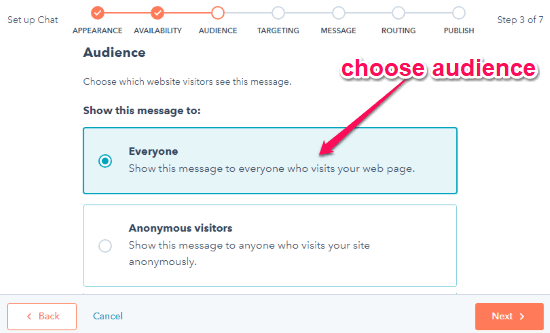
Audience: In this step, you can choose the audience who can see the “Reply Time” message. You can choose various options including Everyone, Anonymous Visitors, Tracked Contacts, and Segmented Lists (in paid version). The option to hide this message from specific visitors is also a paid feature.
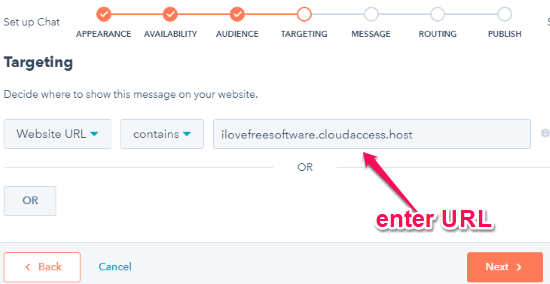
Targeting: Here, it will allow you to choose where you want to show the “Reply Time” message. You can manually enter the URL of your website pages or select the homepage to show it everywhere. You can also set the targeting by using different query parameters.
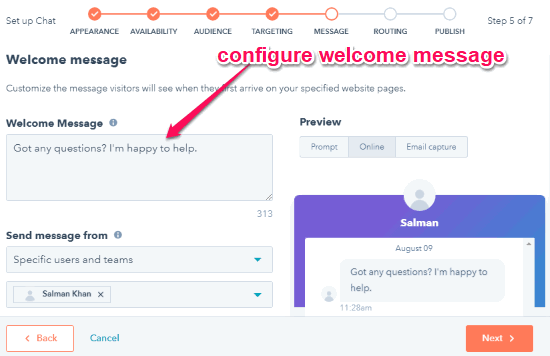
Message: This step is one of the most important steps of setting up the live chat widget. Here, you can configure the welcome message which the visitors will see when they first arrive on your website or any specific page. You can also set the sender of the message, ask visitors for their email, and enable proactive popup of the welcome message. You can see the settings preview on the right.
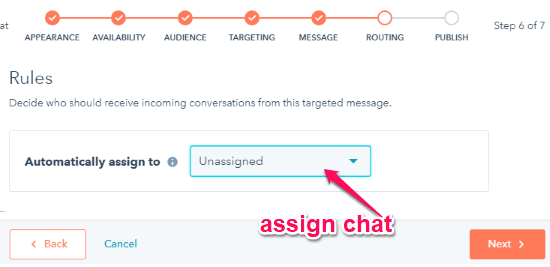
Routing: In this step, you can set who will receive the incoming chats initiated by the welcome message. Unfortunately, you can only receive the conversations as unassigned in the free version and cannot route them to specific user, team, or contact owner.
Publish: When you’re done with all the steps above, you can review the live chat widget on your website and then publish it. As soon as you do that, it will generate a code snippet which you need to copy and paste before the </body> tag on your website.
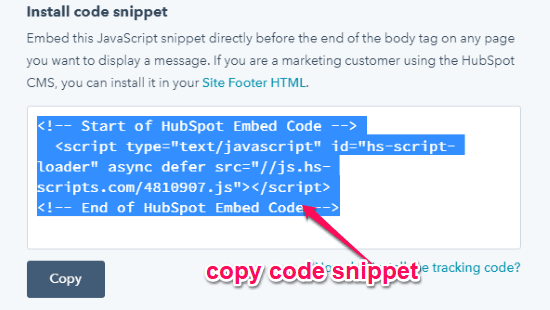
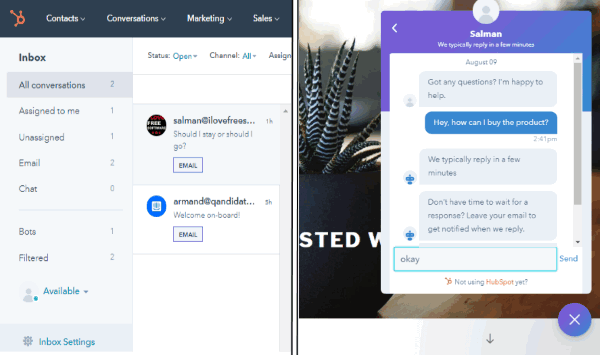
As soon as you do that, the live chat widget of HubSpot Conversations will be added to your website. You can see the widget icon at the bottom right corner. Now, your website visitors can click on the widget to open the chat window and start sending their queries. If you’re not online, then they will receive the “Reply Time” message and also get prompted for entering their email so that you can follow up later.
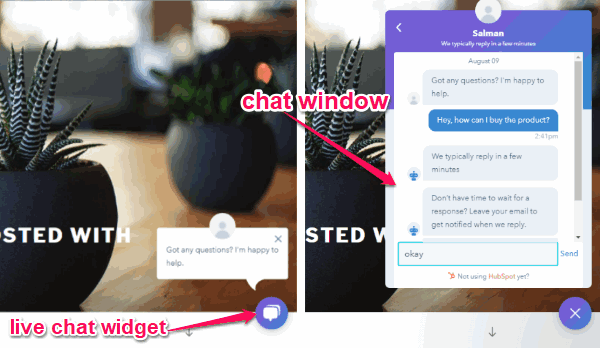
All the queries sent by your website visitors will be visible on the “Conversations” tab of your HubSpot dashboard. Initially, the conversations will not be assigned to any team member. But, you and your team members can see the chat request and then click on the “Assign to me and reply” option to start the conversation.
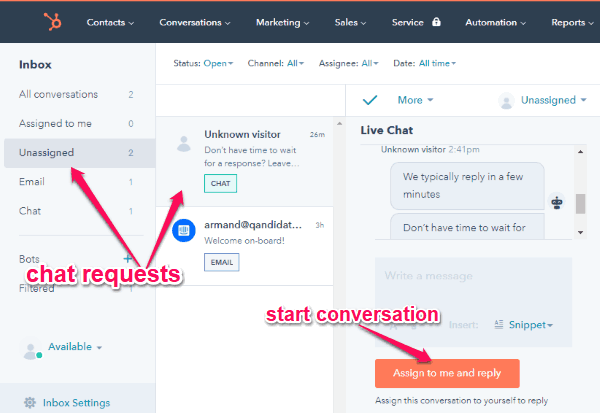
This way you can start conversations with your website visitors using the live chat widget and respond to their queries with ease. The option to assign the chat to other team members is not available in the free version. You can easily read & send text messages, see visitor details like deals, past conversations, etc. One of the unique features of HubSpot Conversations is that it allows you to create message “Snippets”.

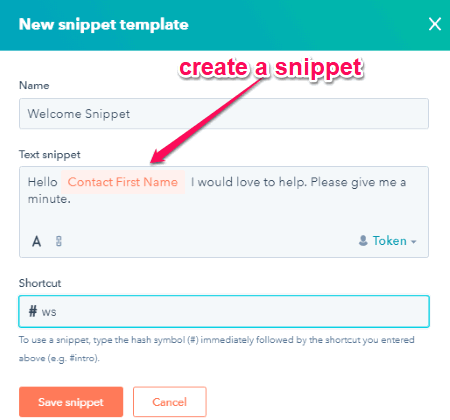
The “Snippets” are actually pre-written or canned messages which you can create for your frequently used responses. Doing so, you can easily send the snippets while chatting with website visitors instead of typing them repeatedly. To create a snippet, simply select “Conversations → Snippets” at the top and then click on the “Create Snippet” button. After that, a popup will appear on which you would need to enter the name of the snippet, snippet text, and shortcut or abbreviation text.
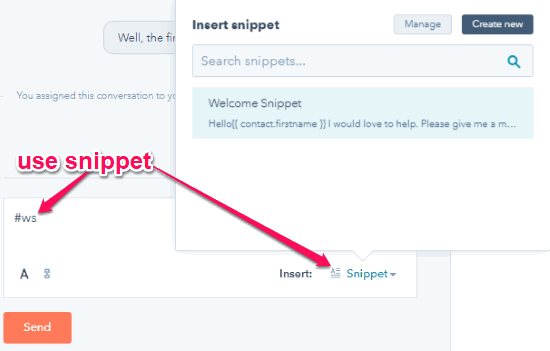
This way you can create easily snippets with separate text and abbreviations. The free version allows you to have 5 active snippets at a time. Now, to use a snippet during a chat, all you gotta do is click type “#” followed by the abbreviation and hit Enter. This will add the snippet text to the message field. You can also click on the “Snippet” option associated with the message field and then search and select any of your snippets to use.
How to Setup and Use Team Email using HubSpot Conversations:
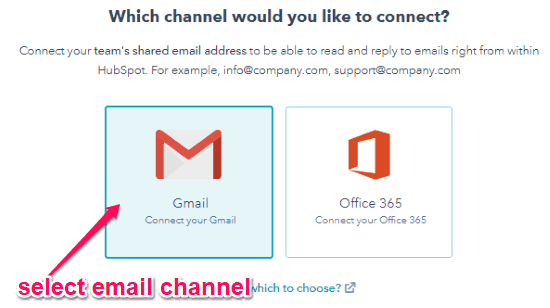
To get started, you would need to click on the “Email” option on the left panel and then hit the “Connect Team Email” button. After that, it will ask you to choose a channel between Gmail and Office 365. Let’s say, you have select the “Gmail” option, then it will ask you to connect a Gmail account.
You can connect any of your Gmail accounts which you want to use as your team email. After that, you will also see the option to create rules for assigning the incoming emails and perform actions, but these features are not available in the free version. As soon as you’re done with connecting an email account, all the emails sent to this email ID will be visible on your HubSpot Conversations inbox.
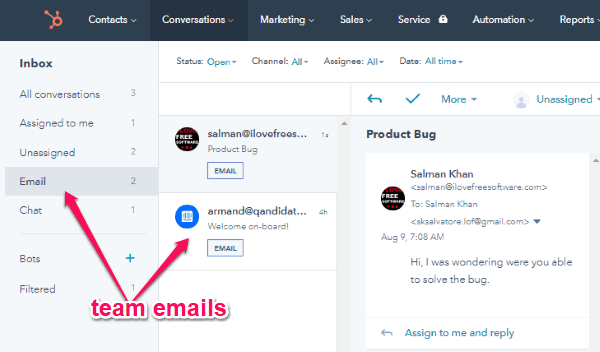
You and your team members can read the emails and reply directly from here. To do that, all you gotta do is select any email and then click on the “Assign to me and reply” option at the bottom. After that, you can type your response and send it directly. You can add text messages to the email body, add documents, etc. The emails will be sent from your original Gmail ID even though you send them from HubSpot Conversations.

Another interesting feature is that you can create custom email “Templates”. To do that, select “Conversations → Templates” at the top and then click on the “Create Template” button. After that, select the “Create an email from blank canvas” option to create a custom template. You can simply enter the template name, subject, and the message body.
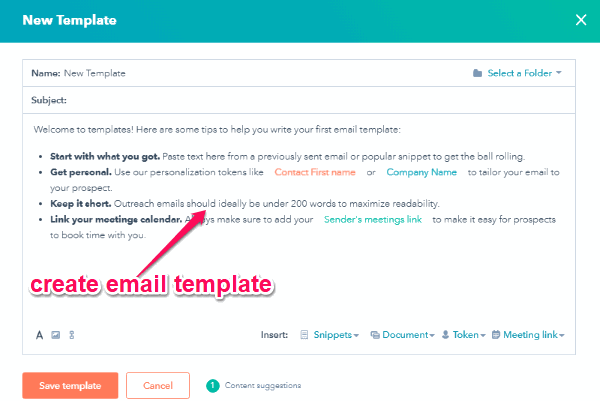
In the message body, you can add snippets, documents (only 5 allowed in the free version), predefined tokens, and meeting link. Once done, save the template and you can use them to easily send emails to anyone you want. Do note that the free version has a limit of 5 templates which you can create and use.
How to Setup and Use Bots to Automatically Send Replies to Website Visitors:
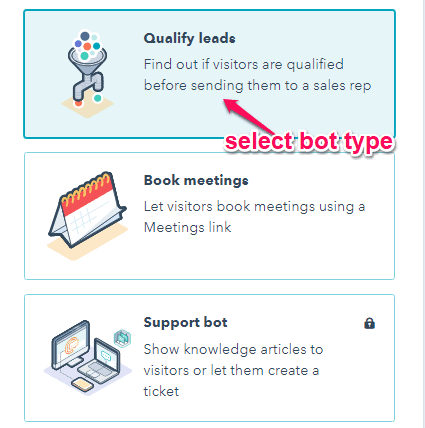
Another amazing feature of HubSpot Conversations is “Bots”. You can easily create custom chatbots which can automatically do the talking with your website visitors. There are 3 types of bots which you can create including:
- Qualify Leads: This bot can find out if your website visitors are qualified before it can send them to any sales representative.
- Book Meetings: It can help your website visitors book meetings with you using a simple Meetings link.
- Support Bot (available in the paid version only): This one actually displays knowledge articles to the visitors and also let them create tickets.
To create a bot, the first thing you gotta do is select “Conversations → Bots” at the top and click on the “Create Bot” button. After that, it will ask you to choose a bot type from the list.
Let’s say, you have selected the “Qualify Leads” bot, then click on the “Create Bot” button at the top and the bot will be created instantly. Now, what you would need to do is connect the bot with the live chat widget. For that, open the ‘Bots” tab and then click on the “Connect to Live Chat” option associated with the bot.
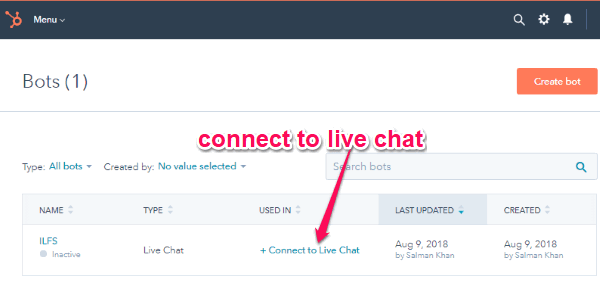
As soon as you do that, it will open a popup where you can select the live chat widget. After that, the chatbot will be integrated with the live chat and start sending auto-replies to your website visitors. It will respond based on the bot type selected by you. This way you can create different types of bots to convert website visitors to leads, have meetings with visitors or potential clients, etc.

Closing Words:
HubSpot Conversations is a very useful addition by HubSpot to its native CRM application. Now, apart from managing your customer relationship, you can also communicate with your website visitors directly from HubSpot. What makes this “HubSpot Conversations” more useful is that apart from the live chat, you also get shared team email and free chatbots. Go ahead and give all the newly added features a try.