In this tutorial, I will explain how to create individual PDFs using Mail Merge feature. If you want to make similar PDF files, but want to have some data different in each, then you can use this tutorial to perform mail merge on PDF files. Output will be PDF files in which each PDF file will have customized text that you provide. In fact, you can even include separate images in PDF files.
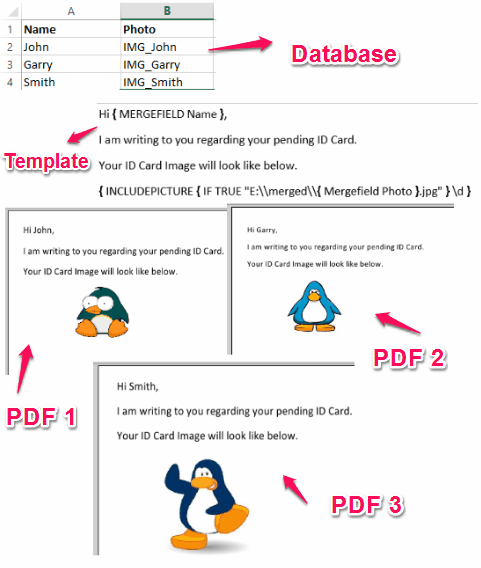
Let’s say you want to email marriage invites in form of PDF files, but want to customize each PDF file so that they have receiver’s name (like, “Hello John”). In that case, you can use this tutorial to provide the template Word file, then data source from where the customized text will be picked, and ultimately the process will generate the customized PDF files for you.
The same technique can be used to generate mail merge PDFs for lot of different things, like, sending PDF invoices, sending personalized PDF notes, etc.
Pretty awesome, right? Let’s see how to go about it.
The first part of this tutorial will explain how to create individual PDF files, without individual images. And the second part will explain how to add images also to PDF files.
How to Create Individual PDF Files using Mail Merge (without individual Images):
Do note that using the steps here, your PDF file can still have images, but they will be common images that will be present in all PDF files. If you want to add different images to each PDF file, you will need to follow section two of this tutorial (I suggest going through this section first anyway).
First of all you have to install a “Merge and Split Add-in for Word 2007-2013” from here. Just download the ZIP file and extract it to any folder. Now run the provided executable to start the installation process.
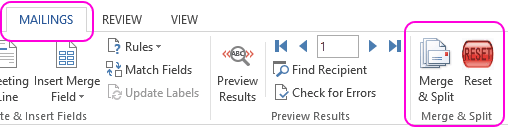
Once you have installed the plugin, start the MS Word. You will see two new buttons in the “Mailings” Menu: “Merge & Split”, and “Reset”.
Here is how to prepare the basic groundwork for using mail merge feature of Word, which will ultimately be used for creating customized PDF files.
- A Word template that will specify how the final PDF files should look. It will have all the common text as well as common images. In addition to that, it will have placeholders for the customized fields that you want to add (like, Name, Photo, etc.). Just open the MS Word and type the common text in the main file, save it to any location.
- Next will be a data source which will have the customized data that you want to add. It can simply be a Word or Excel file. For example, if you want to add different names for guests in each PDF file, then the data source will simply contain all those names. You can do this by simply creating an Excel and Type the Text in various fields (Names, Photo_IDs, etc.). Save the Excel file in any location.
- Now go to saved Word Template and open it. Click “Mailings” Tab on the Ribbon. Here click “Use an existing list” from “Select Recipients“. Now browse for the location for the saved Excel file and select it. Click OK twice. Now place your cursor at the desired position on the opened Word Template and click “Insert Merge Field“. Choose the desired field by clicking over it. Do this for every field you want to insert.
Once the template and the data source are ready, we can start the process of creating customized PDF files. For that, click on “Merge & Split” button. A new dialog box containing Important Information will open, you can hide this just by clicking “Hide this dialog” button.
Now a New Window will open, here you can set various options before starting Merging and Splitting.
Step 1: Choose the output folder by clicking “Browse for Folder” button.
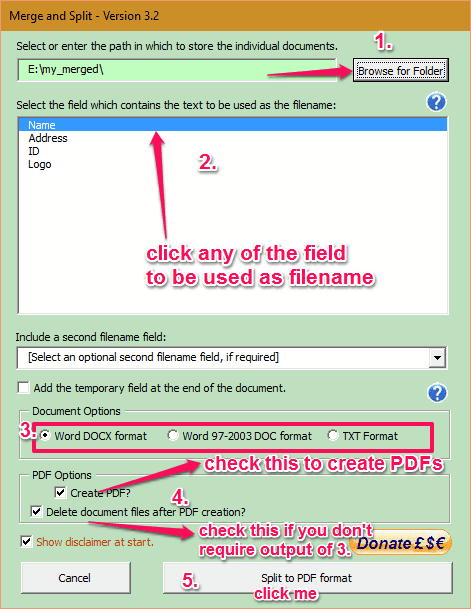
Step 2: Choose the “Field Name” from data source file, which will be used to set the file name(s).
Step 3: Ignore other options and go to “Document Options“, here you can select the alternate output format (DOCX, DOC, or TXT). Choose anyone. Don’t worry, you can delete these in next step.
Step 4: Now from “PDF Options” section, check “Create PDF?” check box. You can also check the “Delete document files after PDF creation?” if you do not require alternate output format from the Step 3.
Step 5: Finally click the “Split to PDF format” button to start the process.
Step 6: Now a new window “Mail Merge Recipients” will open. Here you choose all the records or specific records. You can refine this list by applying Sorting, Filters, and other options.

Step 7: Click OK to start the Mail Merge and Splitting the Individual PDF Files process.
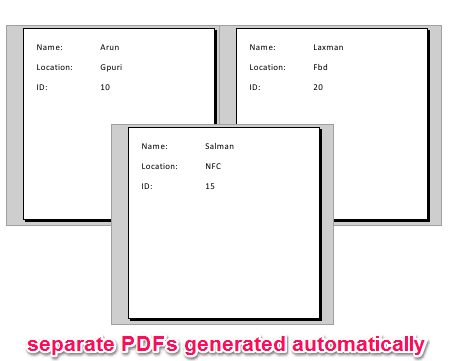
You can now open the output folder which you choose before to check the individual PDF files saved.
Further if you want to send the individual attachments to individual peoples, you can do this by reading Here Complete Tutorial with Add-In Download link.
The steps above explain how to create individual PDF files using Mail Merge, but without images. Let’s say you want to add different images also to PDF file. For that, follow the rest of the tutorial.
How to Create Individual PDF Files using Mail Merge with individual Images:
In this part of the tutorial, we will cover how to create individual PDF files with individual images added to each. You saw the first screenshot of this tutorial? That is exactly what we will be able to achieve here.
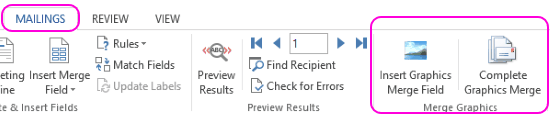
Download the “Mail Merge Graphics Add-In” from here and install it. After that, run the MS Word. You will see 2 New buttons as shown below (in “Mailings” menu).
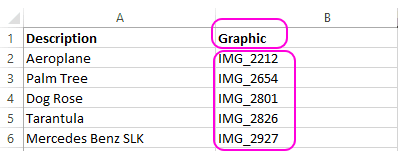
Step 1: First of all you have to create a data source file (either in Word or Excel) containing the desired fields. You have to write the actual image name (without extension) in the column where you want to specify images (in the screenshot below, it is under “Graphic” column header).
Step 2: Now attach this data source with New Word Document and insert the Required fields at the desired position. Now when inserting image Field, use “Insert Graphics Merge Field” button from the Mailings Menu. A new window will open; here you can choose the image Field from the database.
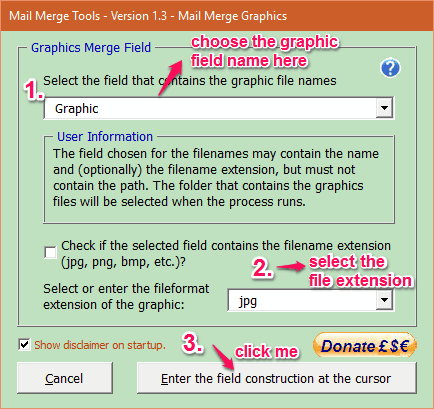
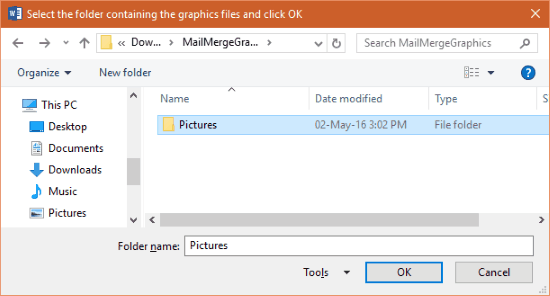
Step 3: Now choose the exact extension and click “Enter the field construction at the cursor“. Again a new window will open. Here you have to provide the path of the folder containing images. Click OK and First image will be automatically added to the current position.
Step 4: Now save the Document.
Step 5: After this, use the “Merge & Split” Add-In, that I mentioned earlier, and follow exactly those steps. At the end of that, you will have individual PDF files, with the corresponding images added to them.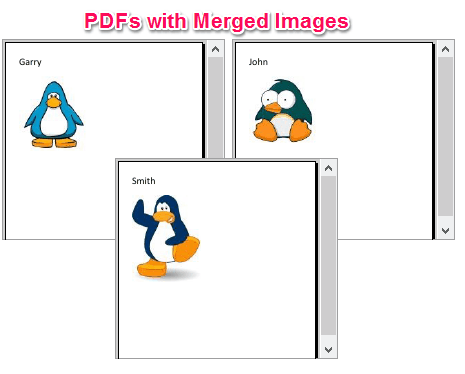
Once you have the PDFs in place, you can use the standard mailing feature of Mail Merge to send out the PDFs.
Conclusion:
This was a pretty tricky problem for me, and it took me quite a while to solve it. At the end of it, I am happy that I was able to figure out how to create individual customized PDFs using mail merge, and also be able to include separate images in those.
I hope you also find it useful. If you know of some other way to do the same, do let me know in comments below.