Here are 5 free double exposure photo maker for Windows. You can use these software to easily overlay two different photos and then create a single double exposure photo out of them. Using these software for that is pretty easy, as all you gotta do is add two photos in different layers and then manually change the opacity of the top layer to give the double exposure effect. They are actually typical image editors which means you will also get other editing options like rotate, crop, resize, and much more to share the double exposure photos in any way you want.
One of the best features of all the double exposure photo maker is that they offer dozens of blending modes like Glow, Multiple, Color Burn, Color Dodge, Reflect, Darken, and more to give the resulting photos an amazing look. If you don’t want to download or install these software, then do not worry, as we have also covered some of the best free online double exposure photo maker.
Let’s get started with the software.
Autodesk Pixlr:
Autodesk Pixlr is one of the best free double exposure photo maker for Windows. It allows you to easily create stunning double exposure photos by combining two photos from your PC. It also provides various blending modes which you can apply after overlaying the images and make the double exposure effect look amazing. The best thing about this software is that it comes with a direct tool to create double exposure photos.
How to Create a Double Exposure Photo using Autodesk Pixlr:
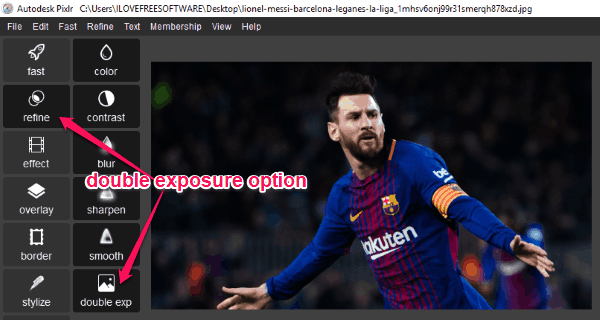
Step 1: To get started, open Autodesk Pixlr and then click on the “Open Image from Computer” button to select the first photo. After that, click on the “Refine” option on the left and select “Double Exposure”.
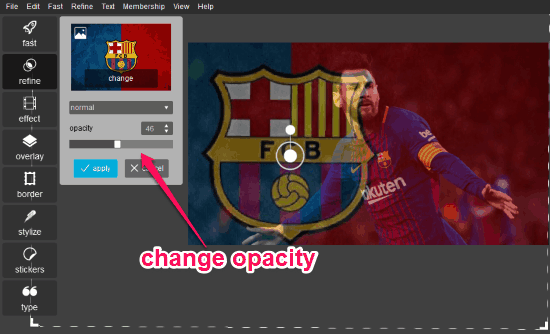
Step 2: As soon as you do that, it will ask you to choose the second photo from our PC. When you do that, the second photo will appear on top of the first photo. Now, to create a double exposure effect, all you gotta do is change the opacity of the second photo. To do that, you can use the “Opacity” slider visible on the small popup dialog on the left.
Step 3: You will also see an option to apply different blending modes to the photo like darken, multiply, color burn, color dodge, overlay, and more. After you’re done with that, you can go ahead and save the double exposure photo to your PC.
Paint.net:
Paint.net is another photo editing software which can be used to create double exposure photos on Windows. This one also allows you to choose any two photos from your PC and then overlay them to create a single double exposure photo. This one also comes with the option to apply different blending modes to the double exposure effect such that your photos look stunning.
How to Create Double Exposure Photo with Paint.net:
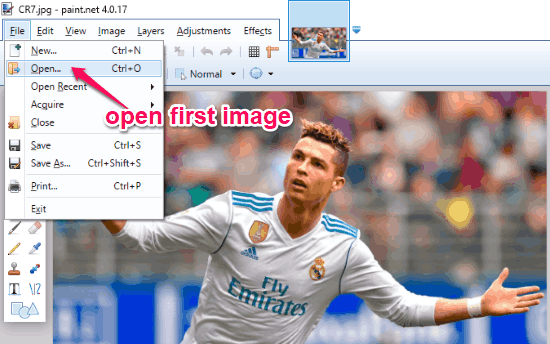
Step 1: To begin, you would need to open Paint.net and then select the first image either by drag & drop or using the “File” menu. Then you can proceed to select the second image.
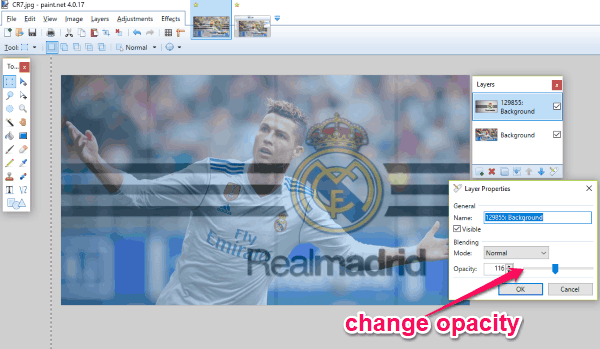
Step 2: To add the second image, simply drag and drop it on top of the first image. As soon as you do that, it will ask you to open the image as in a new window or add as a layer. So, choose the “Add Layer” option and the image will be added on top of the first image. After that, double-click on the second layer visible on the “Layers” palette and then a “Layer Properties” popup will appear. Now, you can apply the double exposure effect just by changing the opacity of the second image.
Step 3: Once you’re done with changing the opacity, you can also apply different blending modes to the resulting photo, like additive, reflect, glow, negation, and more. When you’re all set, you can proceed and save the double exposure photo on your PC.
Krita:
Krita is another free image editor for Windows PC which you can use to create double exposure photos with ease. You can simply pick any two photos you want and then overlay them to make a single stunning double exposure photo. Similar to “Autodesk Pixlr” and “Paint.net”, this software also allows you to make your double exposure photos more interesting by adding different blending modes.
How to Use Krita to Create Double Exposure Photo:
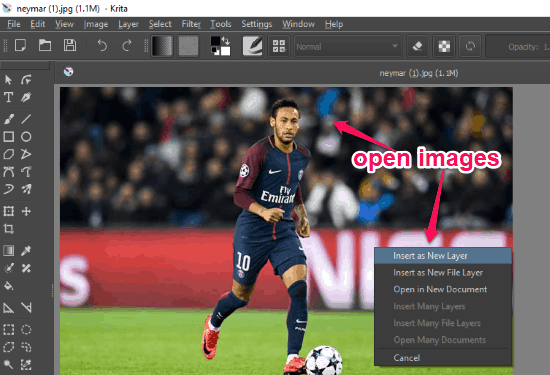
Step 1: To get started, the first thing you need to do is open up the first image that you want to use for creating the double exposure photo. After that, drag and drop the second image on top of the first one. Then it will ask you whether you want to add it as a new layer, new file layer, etc. So, select the “Insert as New Layer” option.
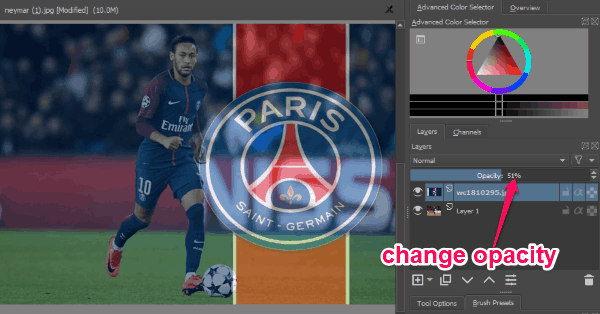
Step 2: As soon as you do that, the second image will be added as an overlay to the first image. Now, what you need to do is change the transparency or opacity of the second layer. You can do that by selecting the second layer on the “Layers” palette on the left and then dragging the “Opacity” slider. This will add the double exposure effect to the photos.
Step 3: In this double exposure photo maker, you will also find the option to choose different blending modes including erase, lighten, saturation, soft light, luminosity, and so on. You can easily add any of these modes to the photo and make it look more appealing. Once done, you can export the double exposure photo with ease.
Pinta:
Pinta is another simple double exposure photo maker which you can use to easily create some eye-catching double exposure photos on your PC. You can easily select two photos and then combine them using layering to get the resulting photo. It also lets you use various blend modes to give your photo a great look.
How to Create Double Exposure Photo with Pinta:
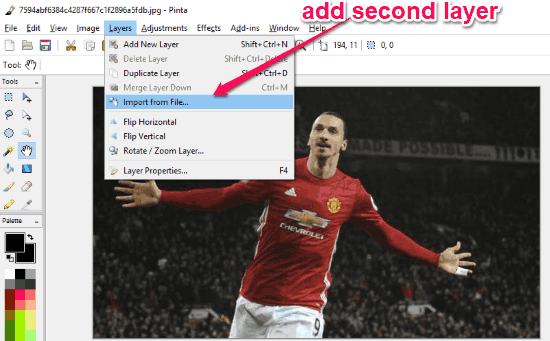
Step 1: First, you would need to open Pinta and import an image to the first layer. You can do that by simply dragging & dropping an image or use the “File → Open” menu. After that, you can proceed and import the second image from your PC. To do that, click on the “Layers” menu and then select “Import from File” option.
Step 2: Now, you can pick any image you want which will be added on top of the first layer. Now, under the “Layers” palette double-click on the second layer to open up the “Properties” window. After that, you can create the double exposure photo by reducing the opacity of the image.
Step 3: You can also make the photo look more interesting by adding different blend modes from the “Properties” window. It supports almost all the popular blending modes like multiply, color dodge, color burn, and so on. Once done, save the resulting photo from the “File” menu.
GIMP:
GIMP can also be used to create double exposure photos on Windows PC. This image editor lets you choose two different photos and then manually combine them into a double exposure photo. Similar to other software explained in this post, it comes with an intuitive interface you can do the job with ease. It offers more than 40 blending modes which you can use while creating a double exposure photo.
How to Use GIMP to Create Double Exposure Photo:
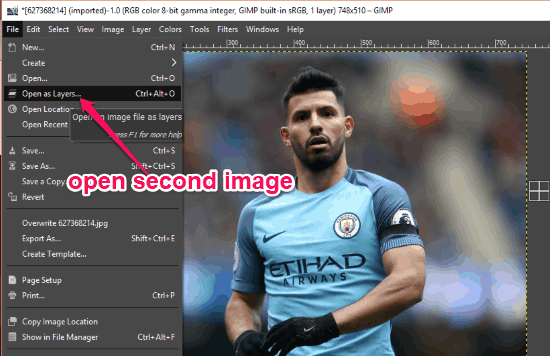
Step 1: After opening GIMP, simply import an image either by selecting “File → Open” menu or just drag & drop it. Then you would need to select and add another image to the second layer. For that, click on the “File” menu and select the “Open as Layers” option from the list.
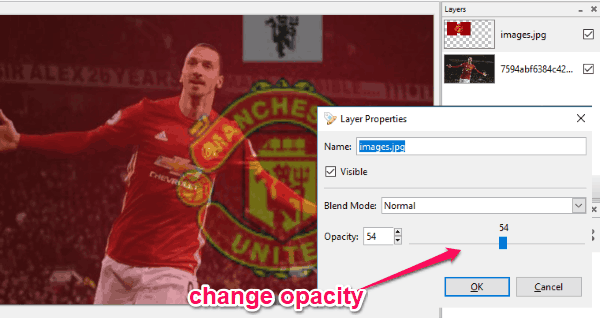
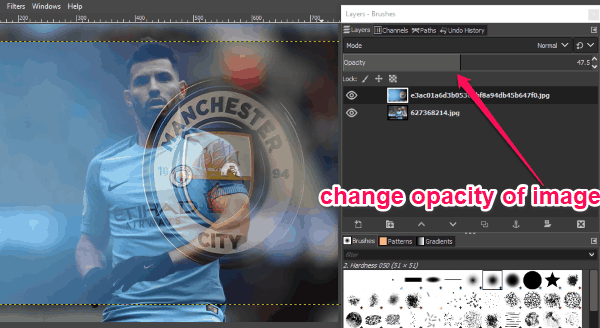
Step 2: After that, select any image you want and it will get added on top of the first image as an overlay. Now, what you need to do is select the second layer under the “Layers” palette and use the “Opacity” slider to decrease the transparency of that layer. This will create the double exposure photo for you.
Step 3: At the top, you will also see the option to apply blend modes to the photo like luma, linear light, burn, divide, hue, and so on. When you’re done, simply export the double exposure photo to your PC.
Closing Words:
So, if you have been looking for a way to easily create double exposure photos on your PC, then start using any of the double exposure photo maker for windows. They make it pretty easy and convenient for you to do the same without much effort. To make your double exposure photos look astonishing, that even lets you apply various blending modes.
Try these software and let me know which one you liked.