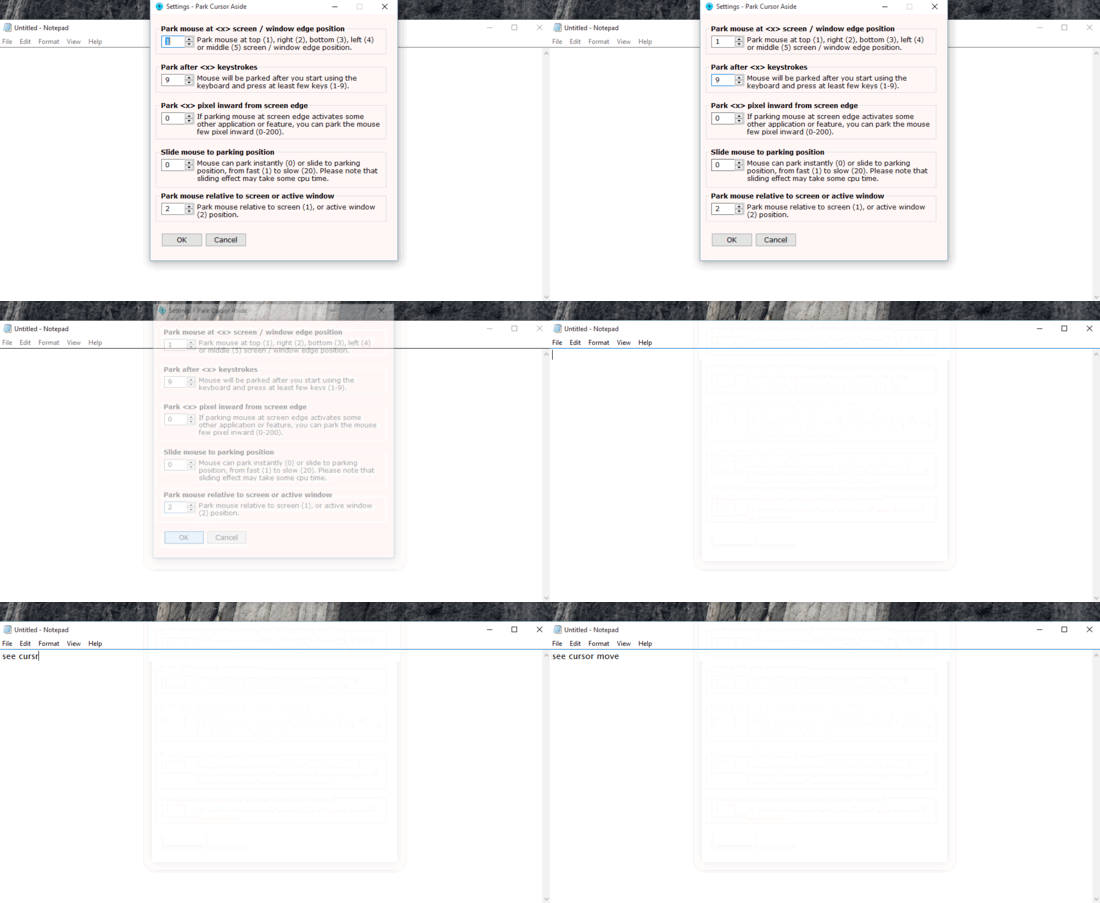
If there’s one UI element that we see almost constantly when working on a computer, it’s undoubtedly the cursor. Also known as the mouse pointer, the little arrow has always been (and still is) a core element of GUI based Operating Systems. It’s the one thing that points to anything and everything that you access on your computer. However, as useful as the diminutive cursor is, it can often get quite obtrusive and annoying. That’s because whenever you click on a text input field, or start typing (or do pretty much anything else) it just stays there, blocking the field of view. And every time you have to move the mouse pointer to move it aside. And that’s a major drag, right?
Not anymore folks, as Park Cursor Aside is here to the rescue. Simple yet amazingly useful, this nifty utility lets you automatically move cursor to set position on typing. Yep, you read that right. You can configure the mouse pointer to be moved to a specific edge of the screen, and even specify the number of keystrokes after which this happens. Psyched? Check on the other side of the break, you’re going to love this.

How To Automatically Move Cursor To Set Position On Typing?
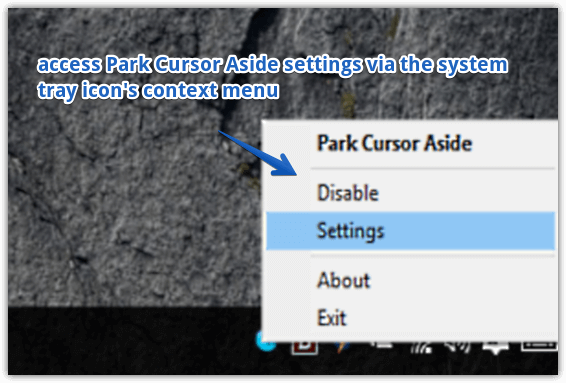
Step 1: At under 500 KB in size, Park Cursor Aside is super low on resources. What’s more, it’s a portable application, so you don’t have to bother with any installations or setups. Just download the zipped utility from its homepage, extract and run it. Park Cursor Aside runs in the system tray, and the context menu can be used to access the program’s settings.

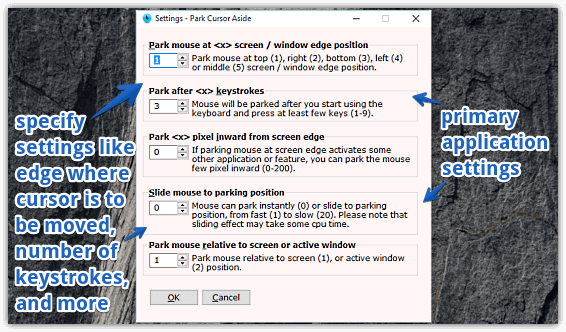
Step 2: The Settings dialog box for Park Cursor Aside lists all the things you can tweak through this utility. The first option, called Park mouse at <x> screen /window edge position lets you specify which edge of the screen you want the cursor to be moved to, and has preset numbers associated with each edge. Next up, there’s the Park after <x> keystrokes option can be used to set the number of keystrokes that must be entered before the mouse pointer moves to the specified desktop edge. There are also a couple of other options, and these let you specify settings such as a cursor snapping animation (slide/instant), set the cursor to be moved a few pixels inward from the edge, and even move it relative to the active window, instead of the desktop screen. Once you’re done making the changes, simply hit the OK button to effect the changes. Here goes a screenshot:

Also Check: How To Increase Mouse Cursor Thickness In Windows 10?
Wrapping Things Up
Park Cursor Aside is an incredibly useful and practical utility that automatically moves the cursor to a position where it’s not an annoyance. Take it for a spin, and I’m sure you’ll wonder why you didn’t find about this thing earlier.